
The process of removing, replacing, and reinstalling the VWR Ergonomic High-Performance Adjustment Knob requires great care, a high attention to detail, patience, and steady hands. Please dedicate a good work area with good lighting and space where small parts can be located should they pop/fly out during disassembly. Pipette damage and lost parts may occur if attention to detail is not maintained. Please proceed at your own risk.
Replacement Parts:
LN SP29327 – Adjustment Knob Kit
Recommended Supplies:
- Pair of gloves
- Bottle of 70% IPA
- Cotton Swabs
- Flat-head screwdriver
Step 1:
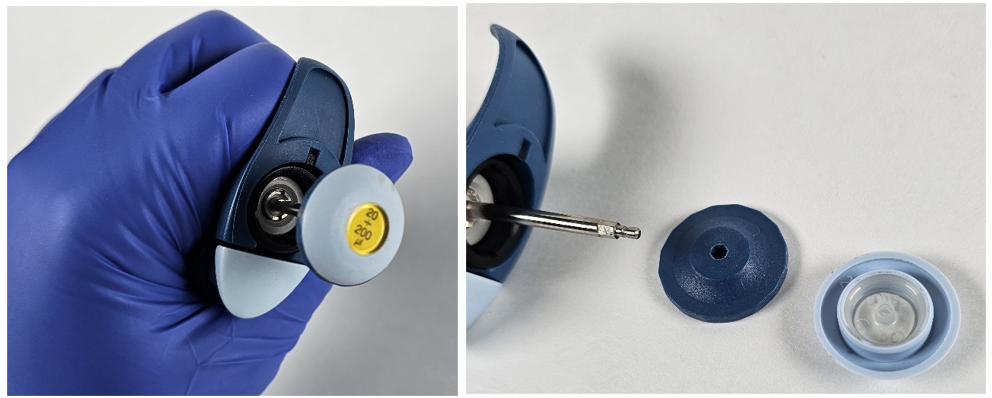
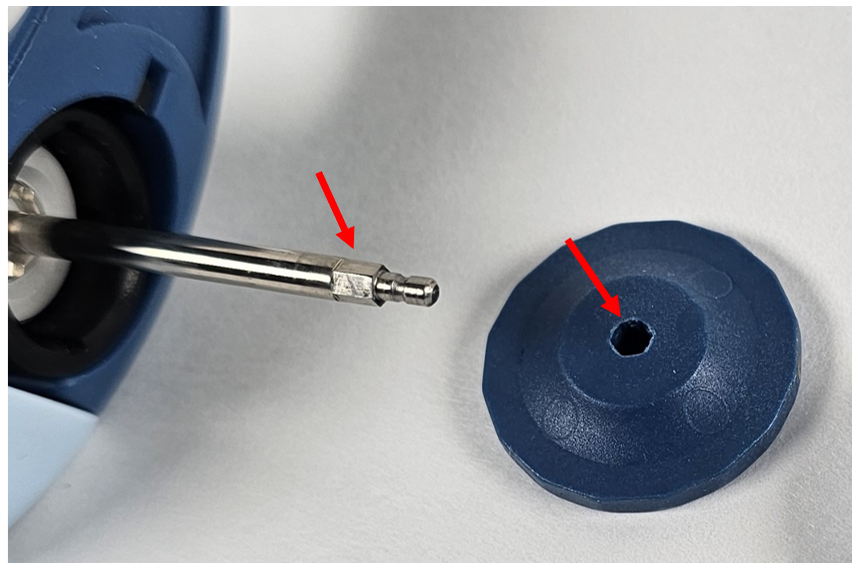
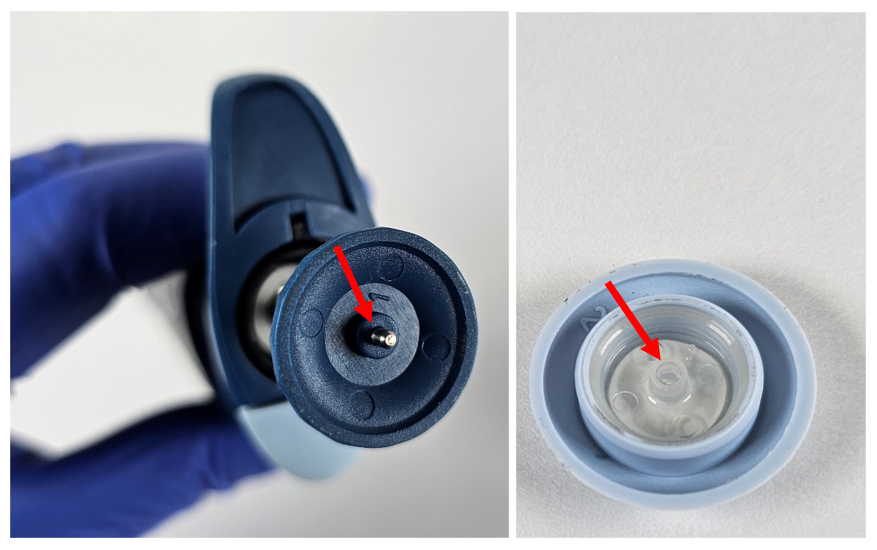
Hold the VWR Ergonomic High-Performance pipette in one hand with the button facing towards you. With the other hand, pull the button away from the pipette body. Please note that the button has two parts. The blue lower has a hex hole that interacts with the operating rod and the top half snaps onto the top of the operating rod to secure both button parts in place.
Step 2:
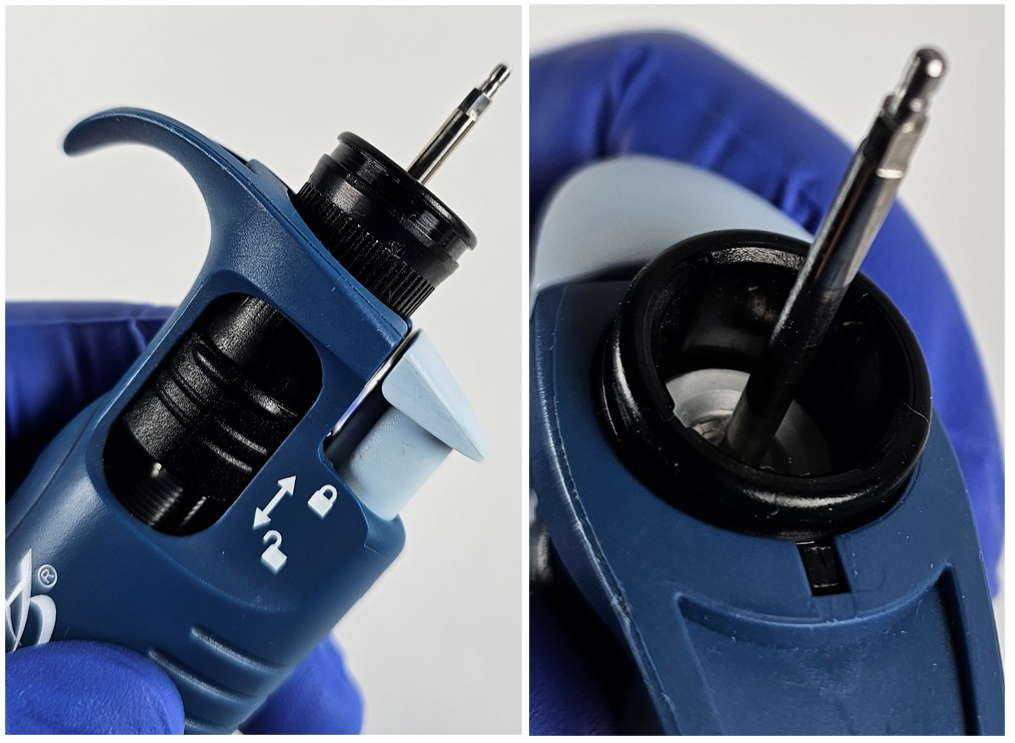
Using a flat-head screwdriver, depress the tab of the bolt by pushing it towards the finger hook.
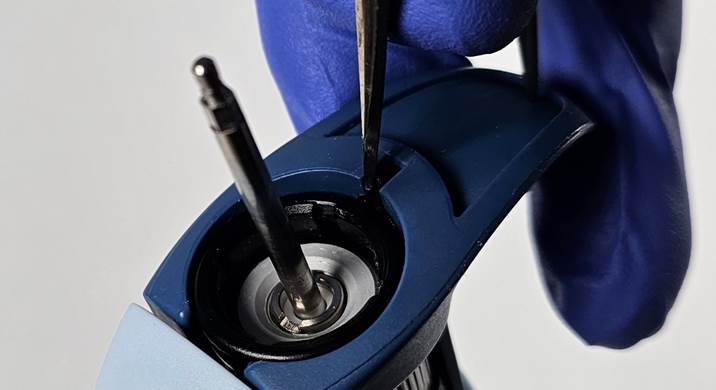
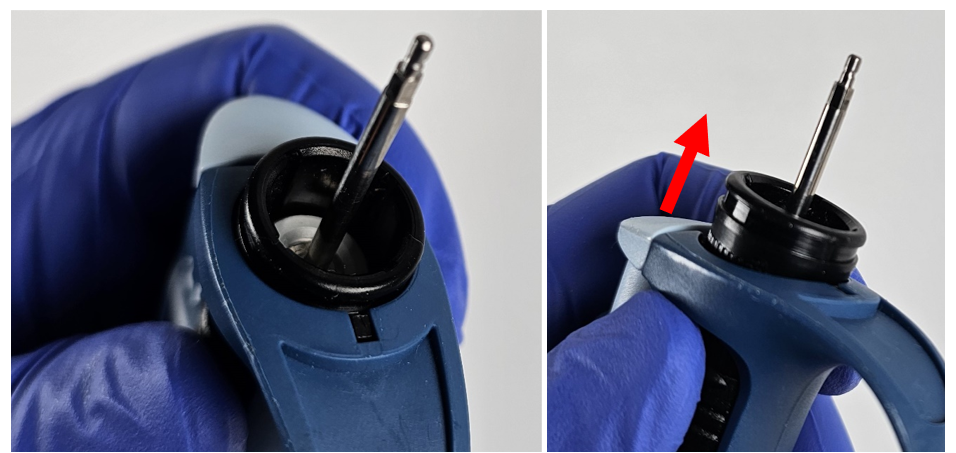
While holding down the bolt (black tab retaining the knob), slide the knob (black cylinder) towards the top of the pipette.
Note: As you remove the knob from the pipette body, be careful not to lose the bolt and spring. The bolt and spring are under a decent amount of spring tension, and it is very easy to lose them.
Step 3:
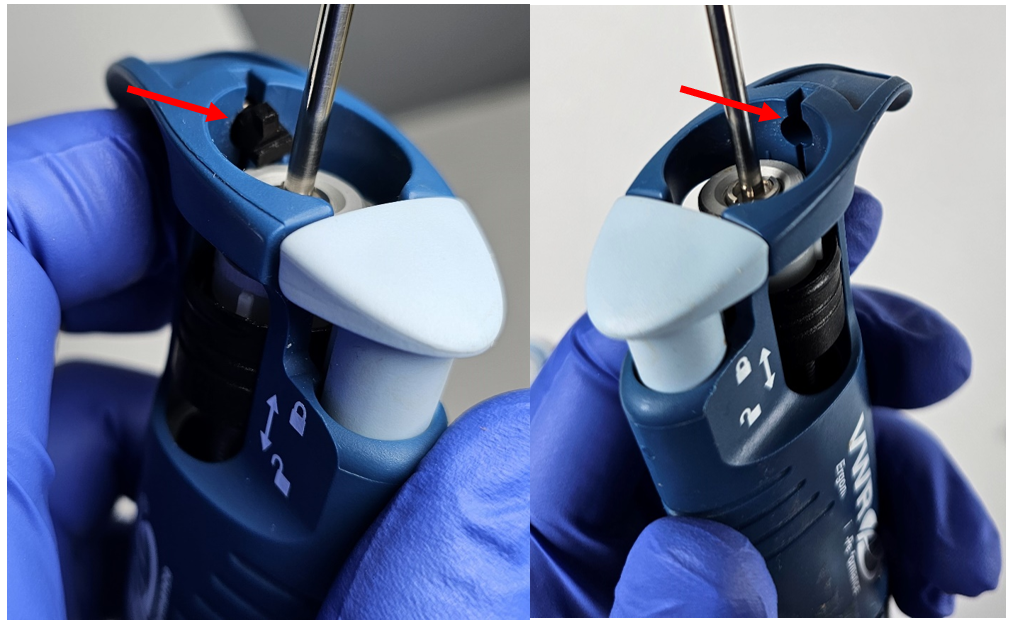
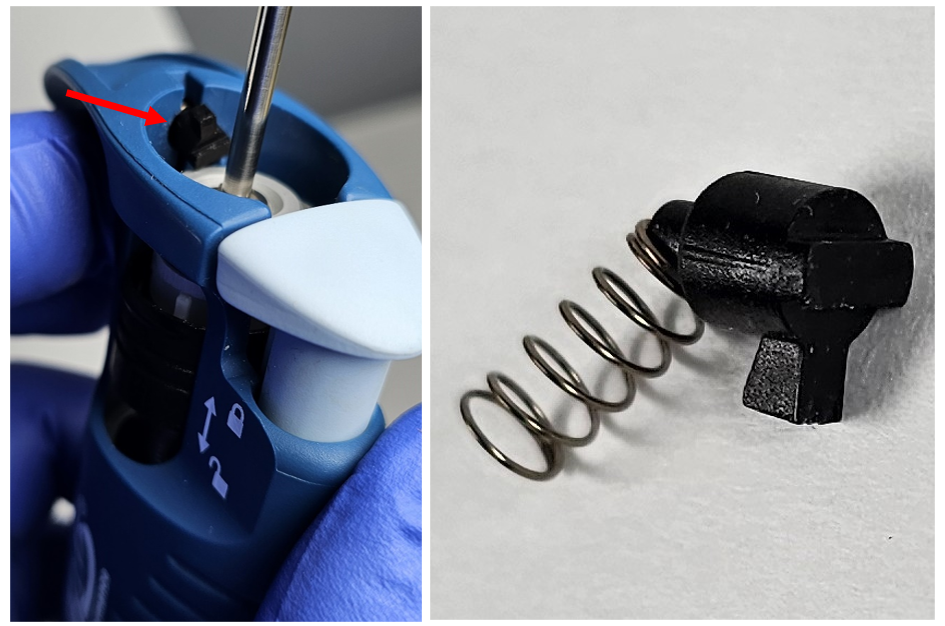
Remove the bolt & spring from the keyed hole in the pipette body.
Step 4:
Remove the locking ring by sliding it out the top of the pipette.
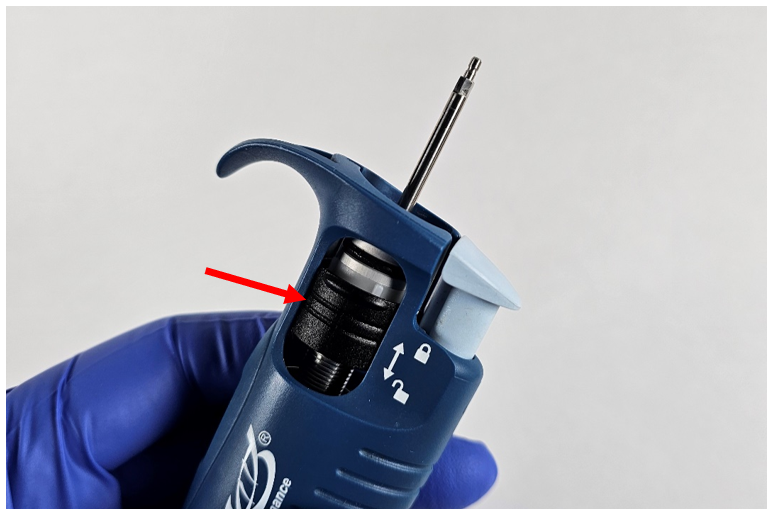
Using a cotton swab (soaked in 70% isopropyl alcohol) to clean the surfaces in the pipette body that interacts with the adjustment knob assembly.
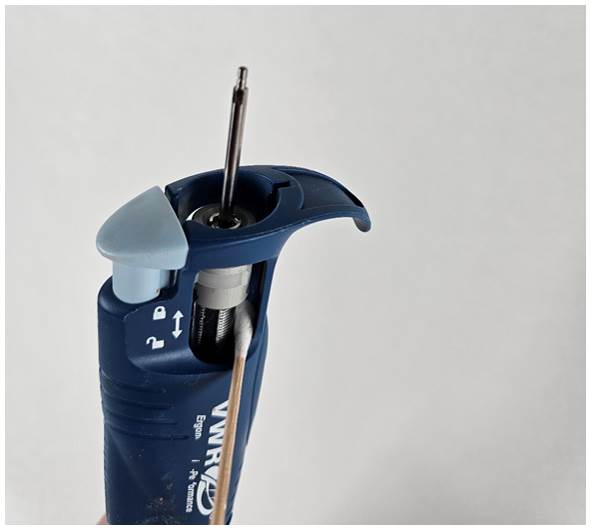
Step 5:
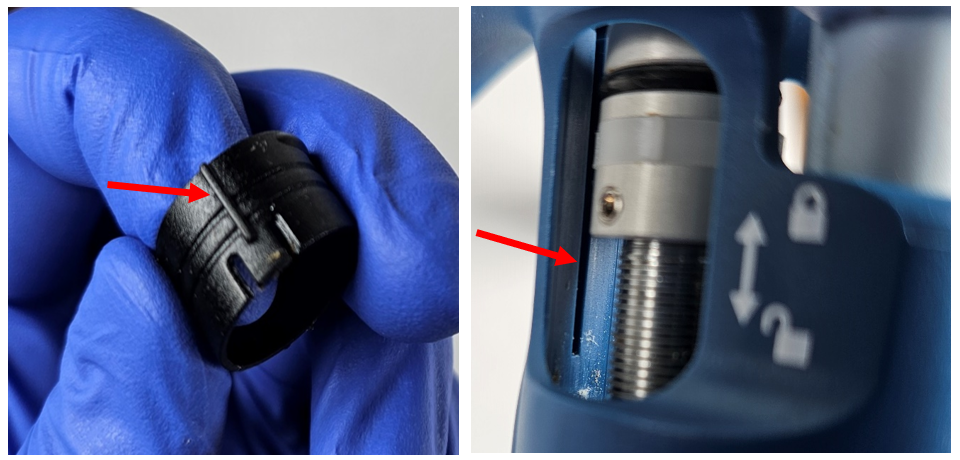
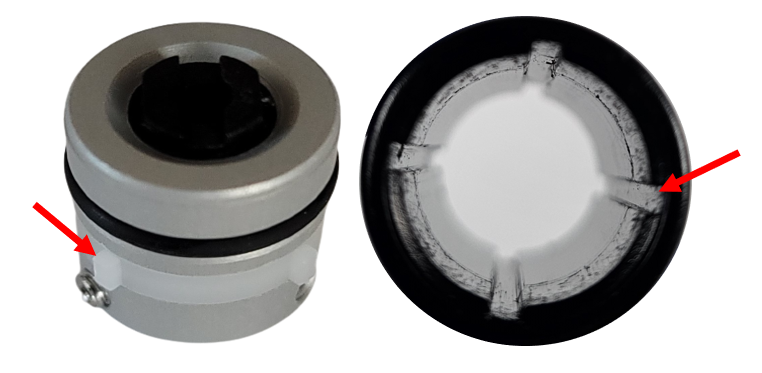
Reinsert the locking ring. It is important to have it in the right orientation for a proper fit. The locking ring has a side with one fin on it. This side matches up with the channel on the counter side.
Note: The tab on the locking ring faces down when it is inserted into the channel on the top of the pipette. The locking ring should fully seat in the pipette body.
Step 6:
Insert the spring and bolt into the designated hole in the body. Make sure to line up the bolt in the correct orientation (tab toward the top) to provide the clearance to seat the knob.
Step 7:
Reinsert the knob (black cylinder), paying special attention to depressing the knob. After the knob is fully seated, the bolt will click into the channel on the top edge of the cylinder.
Note: The knob is keyed to the calibration knob, line up the four fins with the channels in the knob. See the fins on the calibration knob and the channels in the knob (black cylinder) that interact with one another.
Step 8:
Fit the blue half of the button on the hex-shaped part of the operating rod.
Reattach the upper half of the button onto the end of the operating rod. You should feel a tactile click when the button is properly attached.
Related Posts:
Preventative Maintenance: VWR Ergonomic High-Performance (EHP) Single Channel Pipette
How to Calibrate a VWR Ergonomic High Performance (EHP) Pipette
Pipette Parts – Life Span, Life Cycle, and Performance
Top 10 Crimes Committed Against Pipettes
Disclaimer: Any action you take using the information on this website is strictly at your own risk. The information herein does not constitute professional advice and is general in nature. We make no warranty that this information will meet your requirements, be safe, accurate, or error-free. Pipette Supplies, Inc. is not responsible for any errors or omissions, any results obtained from the use of this information, or any loss or damage arising out of the use of this information. This site is for educational purposes only.
Fair Use: Copyright Disclaimer under section 107 of the Copyright Act of 1976, allows for “fair use” for purposes such as comments, criticism, teaching, scholarship, news reporting, and research.
Fair use is permitted by copyright statute that might otherwise be infringing.
Leave a Reply