
The process of disassembly, removing, replacing, and reinstalling parts, as well as, performing preventive maintenance (PM) on the VWR EHP single channel pipette require great care. A high attention to detail, patience, and steady hands are required. Please dedicate a good work area with good lighting and space where small parts can be located should they pop/fly out during disassembly. Pipette damage and lost parts may occur if attention to detail is not maintained. Please proceed at your own risk.
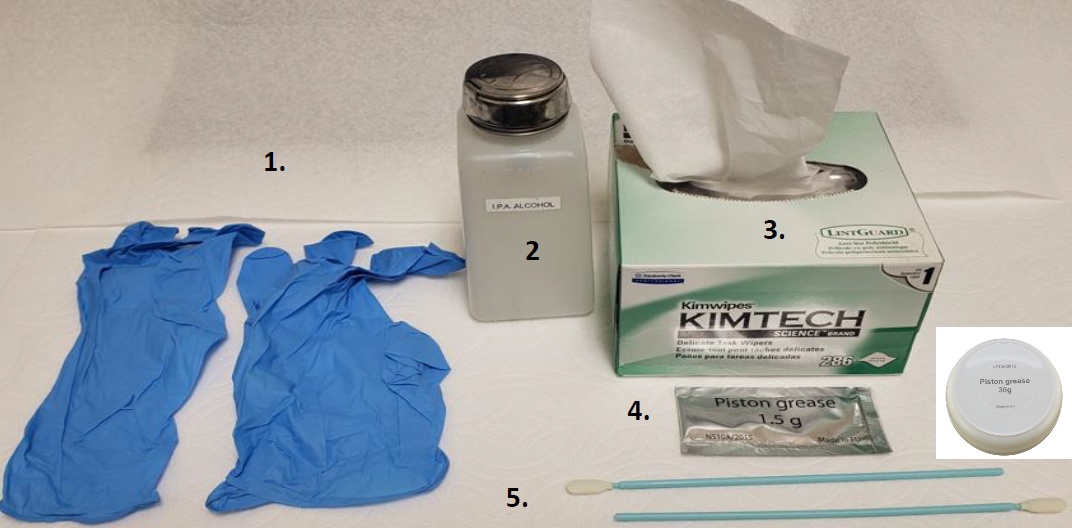
Recommended Supplies:
- Pair of gloves
- Bottle of 70% IPA
- Box of Kim Wipes
- VWR Piston 1.5g Grease: LN SP29019 1.5grams or LN SP29021 for 30g
- 1-2 foam swabs
- VWR EHP single channel replacement parts can be found here.
Note: These instructions are applicable for the volume sizes 2uL-1mL of the VWR EHP single channel pipette.
It’s recommended that a 4-5 analytical balance be used to check the accuracy and precision performance of the pipette after preventative maintenance, part replacement & reassembly, and 1 hour equilibration period is completed.
Disassembly and Preventive Maintenance Process:
Step 1:
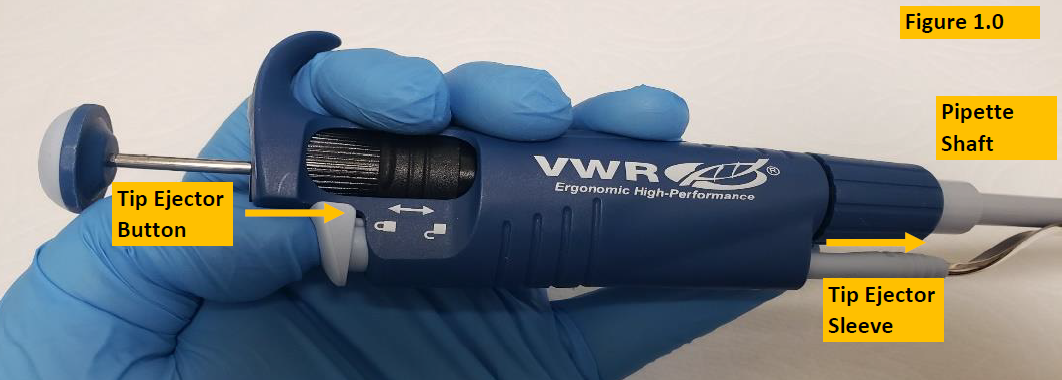
Press and hold down the VWR EHP tip ejector button as you pull down and slide the tip ejector sleeve away from the pipette shaft. See Figure 1.0
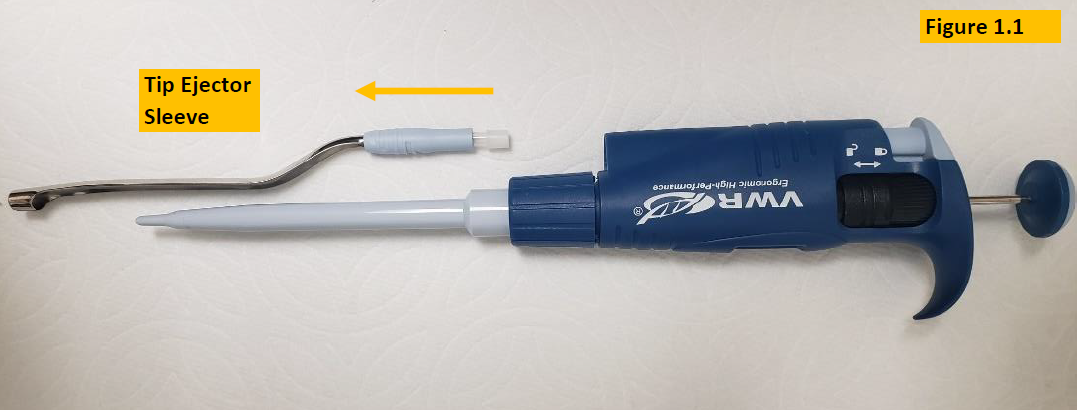
NOTE: Figure 1.1 shows the tip ejector sleeve removed from the pipette. See replacement parts for a complete list of tip ejector sleeves, if needed.
Step 2:
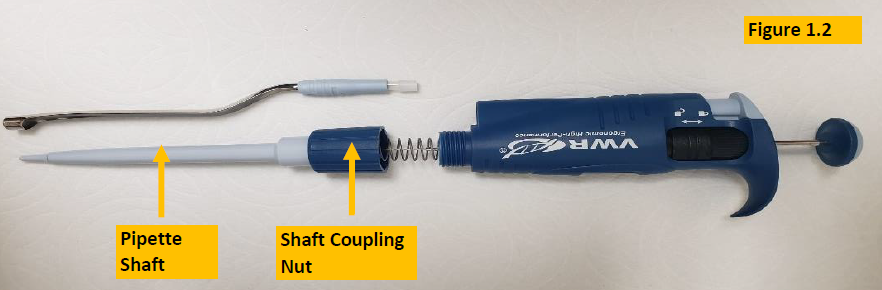
Unscrew the shaft coupling nut slowly and away from the pipette body. Figure 1.2
NOTE: There is an internal spring that is under pressure and may pop open forcibly. Open slowly over a table in case internal parts pop out.
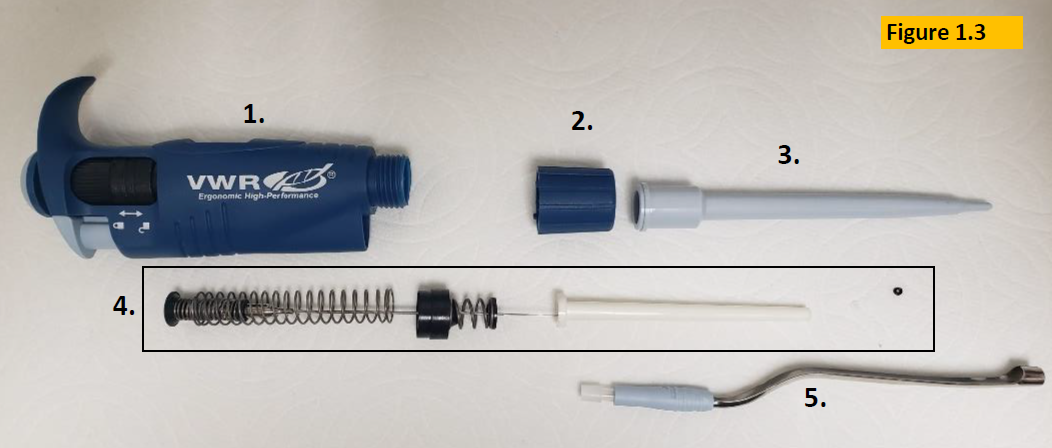
NOTE: Once the shaft coupling nut is unthreaded and lower shaft assembly is separated from the body, the following parts are exposed for PM purposes:
- Pipette Body
- Shaft Coupling Nut
- Pipette Shaft
- Piston Assembly
- Tip Ejector Sleeve
Figure 1.3
Step 3:
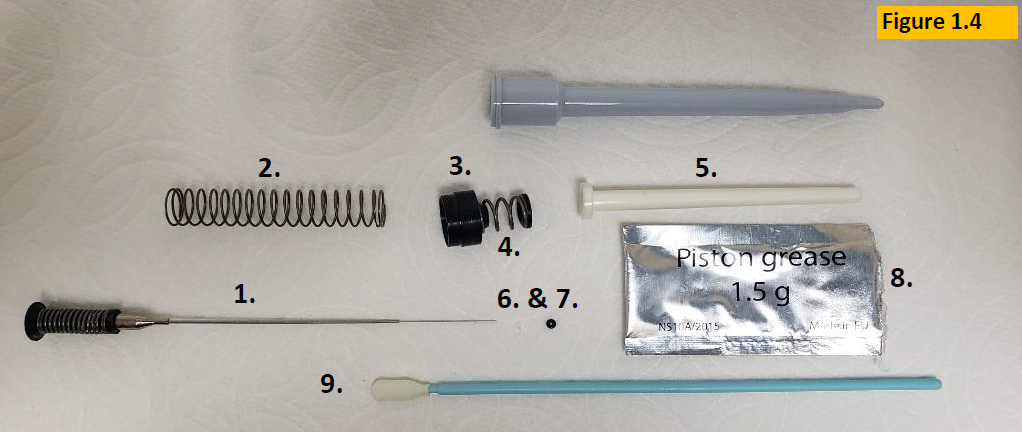
Remove the following components from the VWR EHP piston assembly as in Figure 1.4:
- Piston
- Piston Spring
- Large Retainer
- Small Spring/Retainer
- Seal Spacing Tube
- Seal
- O-Ring
Step 4:
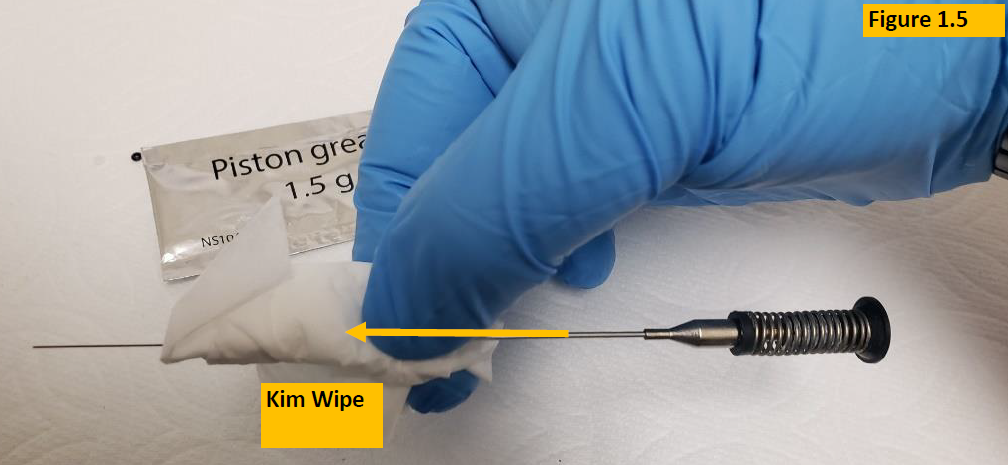
Clean and remove old lubricant/grease from piston with a Kim wipe. Figure 1.5. Take care to not scratch the piston. Turn/fold over the Kim wipe, so a fresh and unused portion comes in contact with the piston. See VWR EHP replacement parts for piston assemblies, if a replacement is needed. Look for rust, scratches, warped/bent, pit marks, visible chemical splash.
Step 5:
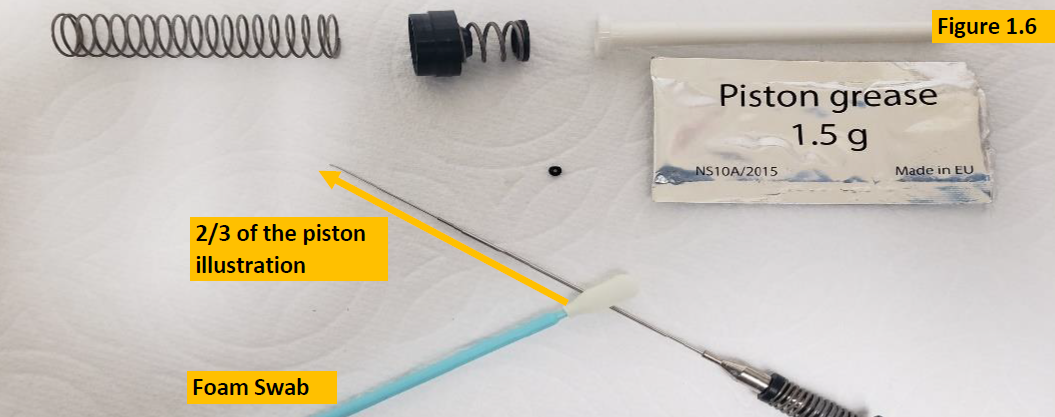
With a clean foam swab apply a light, but slightly visible coating of the 1.5g piston grease onto the piston. Figure 1.6
Note: Lubricating the piston from the piston tip to approximately 2/3 of the way up is more than sufficient. No need to lubricate the entire piston.
Step 6:
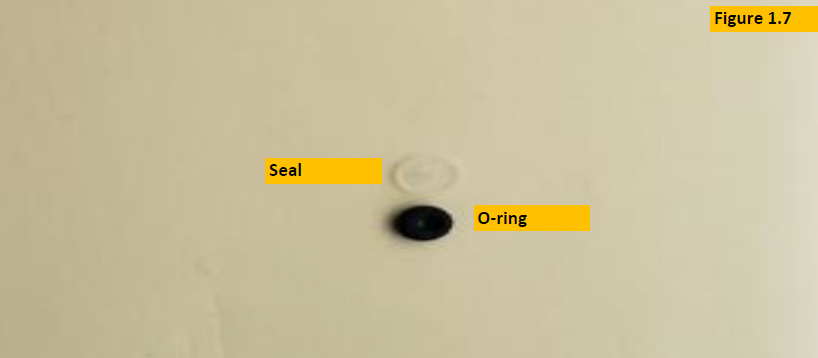
Inspect and replace the seal and o-ring. It’s recommended to replace both at the same time to allow them to wear in together. See VWR EHP replacement parts for seal
and o-ring part numbers. Look for cracks, wear and tear, chemical splash, shape, etc.
Re-assembly Instructions:
Step 7:
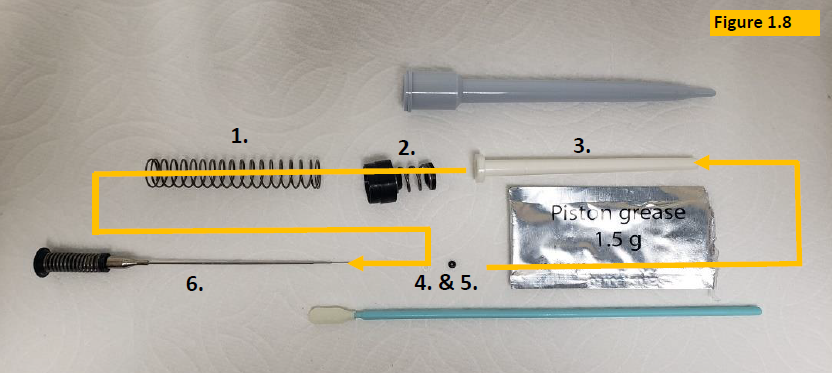
Install the following parts in order as shown in Figure 1.8.
- Install piston spring (1) onto piston (6).
- Install large retainer (2) onto piston spring (1), then onto piston (6).
- Install seal spacing tube (3) onto retainers (2).
- Lastly install new seal and o-ring onto piston assembly. O-ring should be installed last.
How Piston should look upon reassembly:

Step 8:
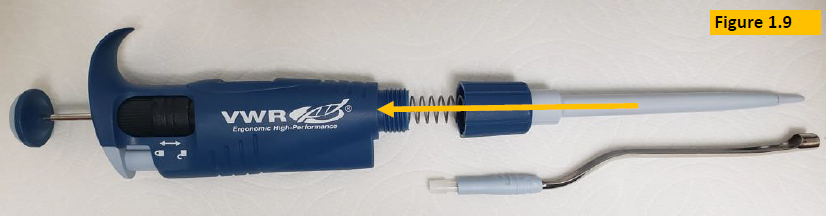
Place piston assembly back into the pipette shaft. Then screw the shaft coupling nut back onto the pipette body until snug. Figure 1.9
Step 9:
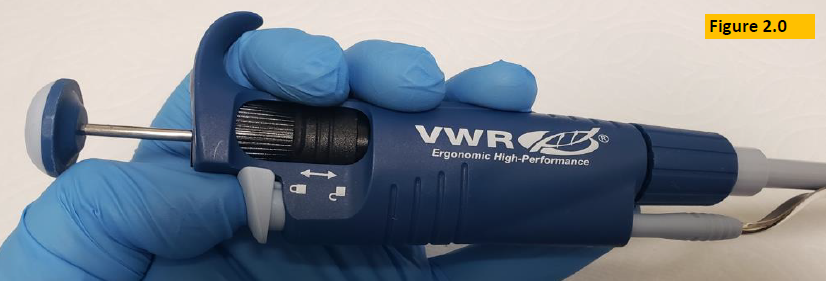
Reattach tip ejector sleeve to pipette body. Figure 2.0
Step 10:
Allow fully reassembled VWR EHP pipette to equilibrate at least 60 minutes before verifying accuracy and precision on a 4-5 place analytical balance.
Related Posts:
How to Calibrate a VWR Ergonomic High Performance (EHP) Pipette
Preventive Maintenance: VWR Ultra High-Performance (UHP) Single Channel Pipette
How to Calibrate a VWR Ultra High Performance (UHP) Single Channel Pipette
Disclaimer: Any action you take using the information on this website is strictly at your own risk. The information herein does not constitute professional advice and is general in nature. We make no warranty that this information will meet your requirements, be safe, accurate, or error-free. Pipette Supplies, Inc. is not responsible for any errors or omissions, any results obtained from the use of this information, or any loss or damage arising out of the use of this information. This site is for educational purposes only.
Fair Use: Copyright Disclaimer under section 107 of the Copyright Act of 1976, allows for “fair use” for purposes such as comments, criticism, teaching, scholarship, news reporting, and research.
Fair use is permitted by copyright statute that might otherwise be infringing.
Leave a Reply