These adjustment instructions cover the following Nichiryo models:
- Nichiryo Oxford Benchmate I
- Nichiryo Oxford Benchmate II
- Nichiryo Nichipet
- Nichiryo Nichipet EX
- Nichiryo Nichipet EX II
Notes:
- Nominal Volume – The max volume a pipette can measure.
- Before attempting calibration/adjustment, please make sure the sealing system(piston, tip holder and seal/o-ring) is functioning properly and is leak-free.
Tool Needed:
– Nichiryo/Oxford Hex Head Wrench Calibration Tool; Item#: NI 5G2-HEX
Step #1:
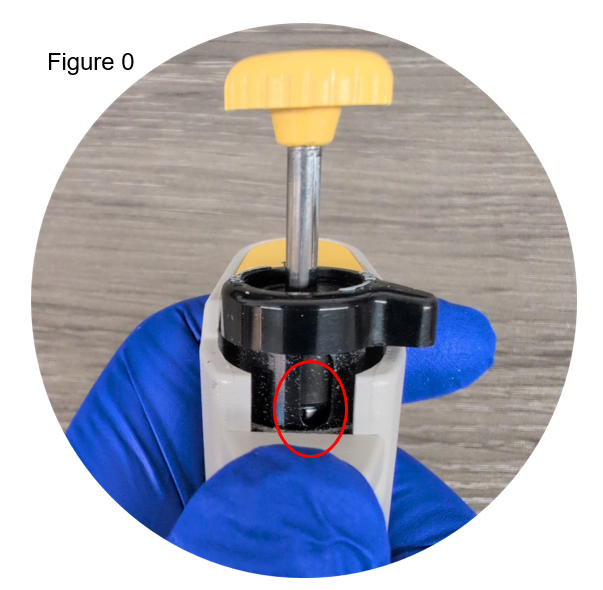
Hold down the ejector button of the pipette and turn the locking lever/collar to expose the adjustment screw channel (figure #0).
Step #2:
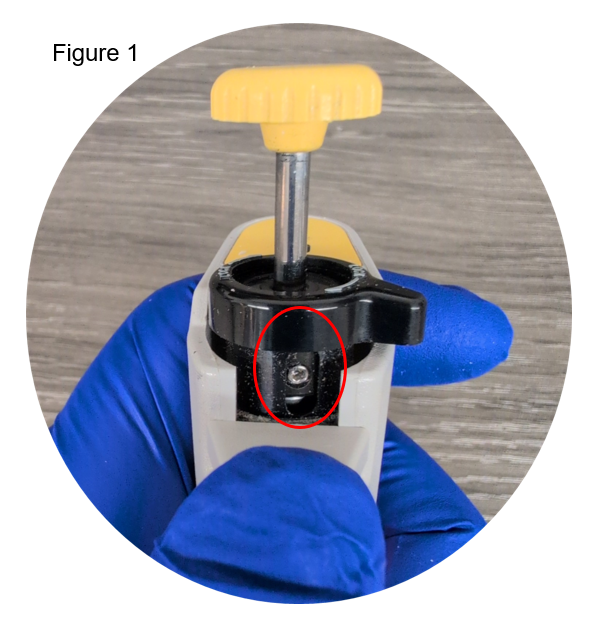
Adjust the pipette to 75-80% of the nominal volume to get access to the set screws. See figure #1 below for the set screw location.
Step #3:
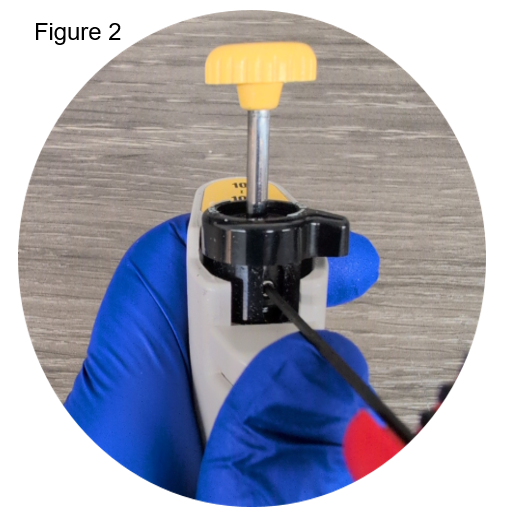
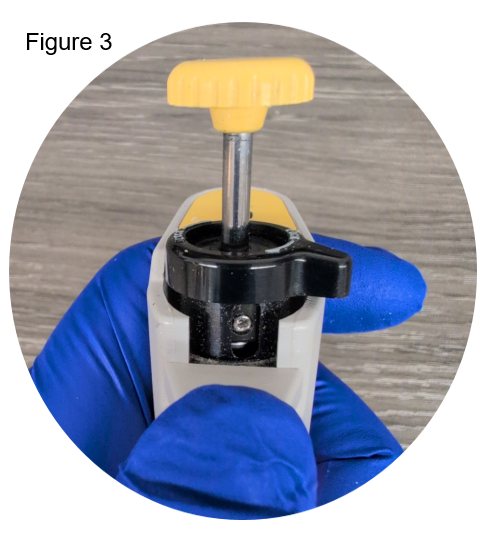
Using the hex key, turn the first set screw counterclockwise one turn (see figure #2). Rotate the button a half turn(in either direction) to expose the second set screw on the opposite side of the adjustment screw (see figure #3).
Step #4:
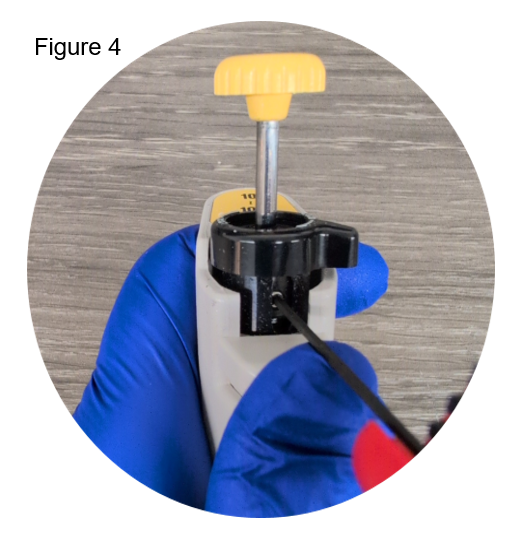
Using the hex key, turn the second set screw counterclockwise one turn (see figure #4). With the hex key still in the second set screw, turn the button to adjust the volume (figure #5).
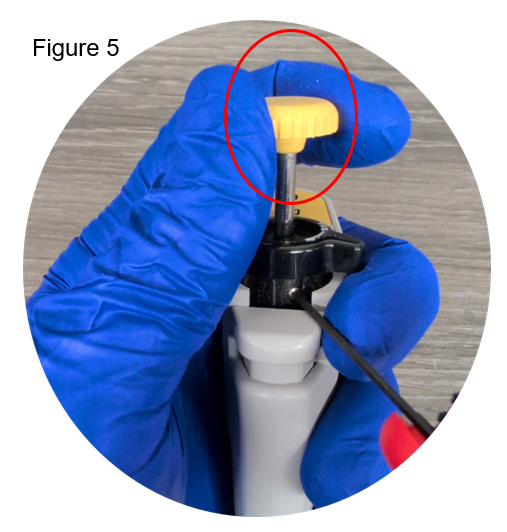
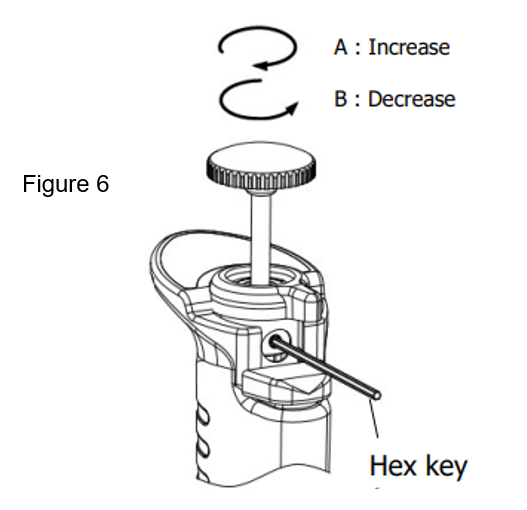
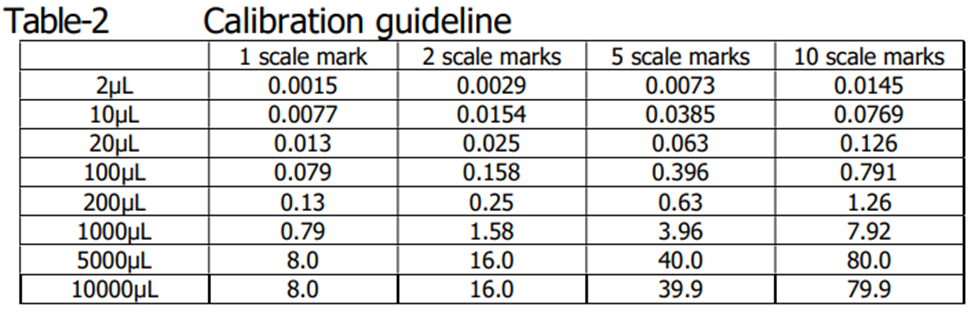
To increase the volume, turn the button clockwise, and to degrease volume, turn the button counterclockwise (see figure #6). Note: Table-2 provides suggested adjustment values based on the nominal volume of a given pipette.
The table below provides suggested adjustment values in microliters based on the nominal volume of the pipette. It is important to use a calibrated balance when adjusting and calibrating pipettes.
Step #5:
After adjusting the pipette, turn the hex key clockwise to tighten the set screw. It is important to only tighten one set screw at step #5, as it can take a few adjustments to get the desired value. Check the pipette at the 10% volume to ensure it is operating within specification and repeat steps 2-5 if additional adjustments are required.
Step #6:
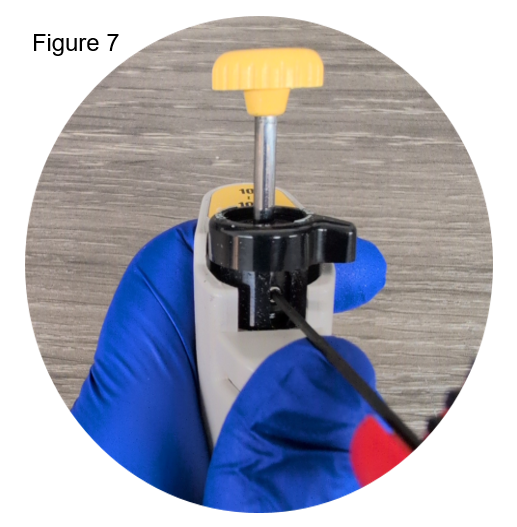
After you have completed an adjustment, make sure both set screws are tight before returning the Nichiryo pipette to service (figure #7).
Related Posts:
Nichiryo Maintenance Videos
Frequency of Pipette Preventative Maintenance and Calibration
Pipette Parts – Life Span, Life Cycle, and Performance
Do I need to verify the accuracy of all channels? (Multichannel Pipettes)
Disclaimer: Any action you take using the information on this website is strictly at your own risk. The information herein does not constitute professional advice and is general in nature. We make no warranty that this information will meet your requirements, be safe, accurate, or error-free. Pipette Supplies, Inc. is not responsible for any errors or omissions, any results obtained from the use of this information, or any loss or damage arising out of the use of this information. This site is for educational purposes only.
Fair Use: Copyright Disclaimer under section 107 of the Copyright Act of 1976, allows for “fair use” for purposes such as comments, criticism, teaching, scholarship, news reporting, and research.
Fair use is permitted by copyright statute that might otherwise be infringing.
Leave a Reply