
The process of removing, replacing, and reinstalling the valve assemblies & Discharge Tubes on the BrandTech Dispensette S, S Organic, and S Trace requires great care, a high attention to detail, patience, and steady hands. Please dedicate a good work area with good lighting and space where small parts can be located should they fly out during disassembly. Pipette damage and lost parts may occur if attention to detail is not maintained. Please proceed at your own risk.
**This post is applicable to the following BrandTech Dispensette models: Dispensette S, Dispensette S Organic, and Dispensette S Trace
Replacement Parts:
- Discharge Tubes
- Dispensette S, S Organic, & S Trace
- The discharge tube is available in two variants, one with a recirculation valve and one without. An easy way to determine which variant you have is to look for the knob on top of the discharge tube.
- Dispensette S, S Organic, & S Trace
- Discharge Valves
- Filling Valves
Note: There are special tools to remove the discharge and filling valves. They are typically included when purchasing the unit.
Recommend Supplies:
- Gloves
- Pipette Tip or 6” Q Tip
- Dispensette S, S Organic, S Trace, & Seripettor Pro Mounting Tool
Preliminary Note(s):
The Dispensette S, S Organic & S Trace models have discharge and filling valves threaded into the body of the bottletop, unlike the older models (Dispensette III & Dispensette Organic).
It is important to ensure the bottle top has been properly flushed with water prior to removing or replacing parts.
Discharge Tube Disassembly/Assembly:
To remove the discharge tube, unseat the clips by applying upward pressure to the outer gray shell.
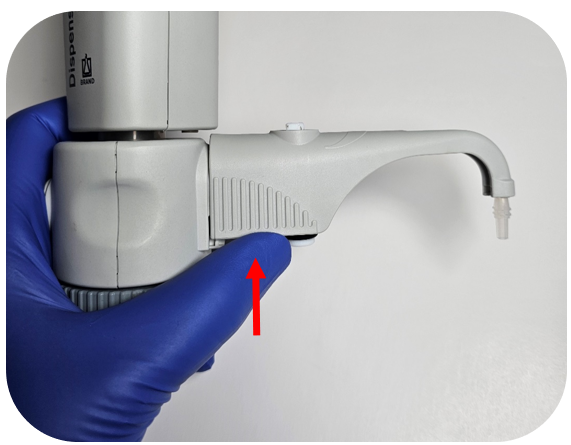
After the clips are unseated, pull the discharge tube away from the bottletop dispenser body while applying light downward pressure on the tube.
Note: The Dispensette S, S Organic, and S Trace Analysis models share the same discharge tube connection. However, it is recommended to use the correct part for each model, as there are differences in their use cases and specifications.
To reseat the discharge tube, firmly insert the tube(s) into their respective openings on the bottletop body until they are fully seated.
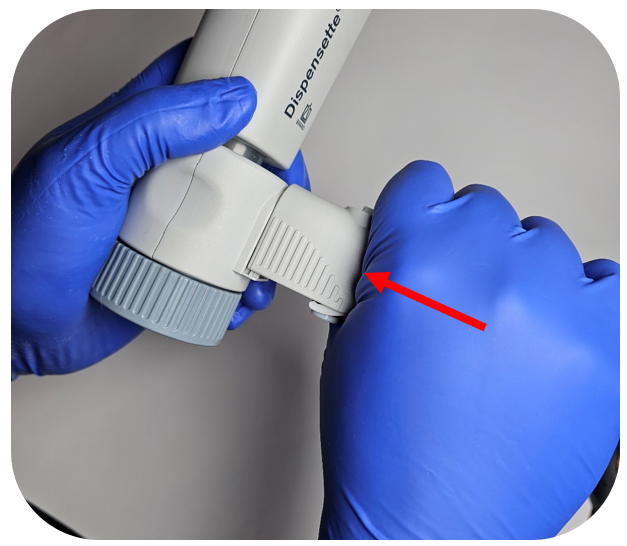
While keeping the inward pressure, push down on the discharge tube assembly until it clicks into place.
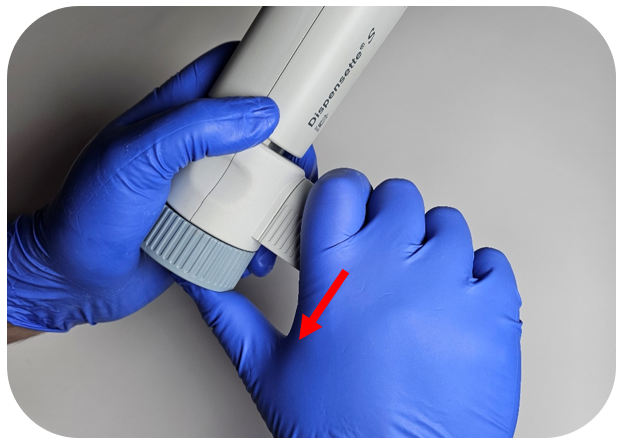
Discharge & Filling Valve Replacement:
See the valve locations referenced in the pictures below:
Discharge Valve:
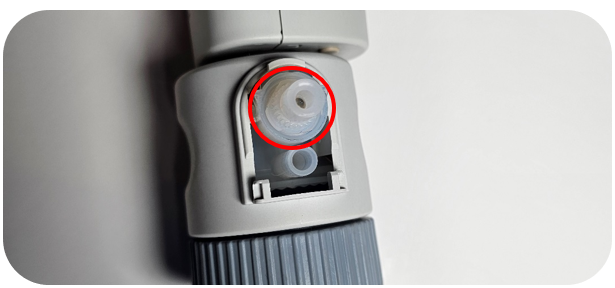
Filling Valve:
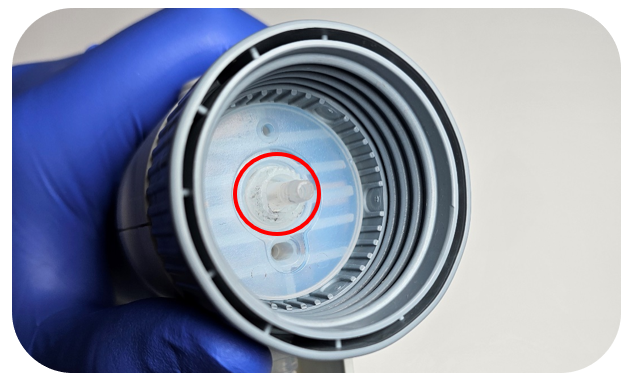
Note: The filling valve is more commonly clogged since it is positioned vertically, allowing solution to settle around the glass ball inside the valve. Refer to the instructions below to free the valve.
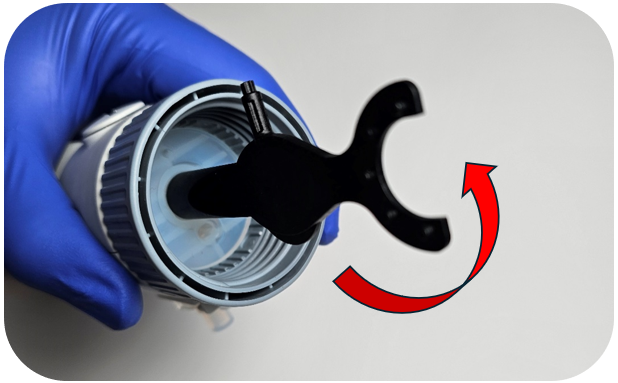
After locating the valve, use the mounting tool to remove it. Ensure the tool is fully seated, then unscrew the valve assembly by turning it counterclockwise.
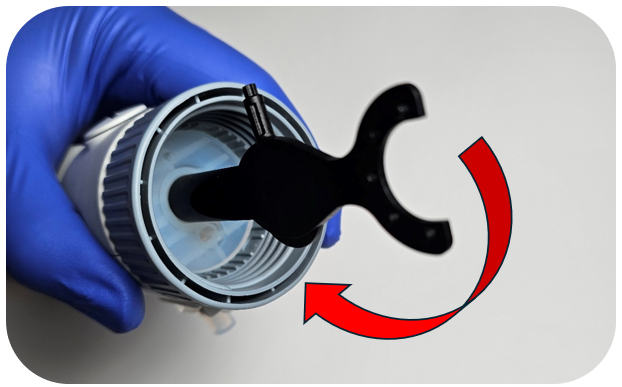
Next secure the new valve in the mounting tool and turn the valve clockwise to tighten. Be careful not to overtight the valve as you can strip the body of the bottletop.
Resetting A Stuck Valve:
It is fairly common for a valve to become stuck. This can occur in either the filling valve or the discharge valve, but the process to free it is simple.
To free the valve, insert a 200 µL pipette tip or the wooden end of a 6-inch cotton swab (Q-Tip) into the valve opening. Apply gentle downward pressure to depress the glass ball inside the valve and release it.
This procedure resolves most issues with these bottletops. However, if the problem persists, the valve may need to be replaced.
Discharge Valve:
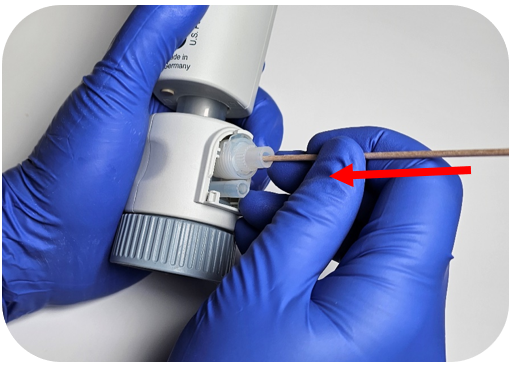
Filling Valve:
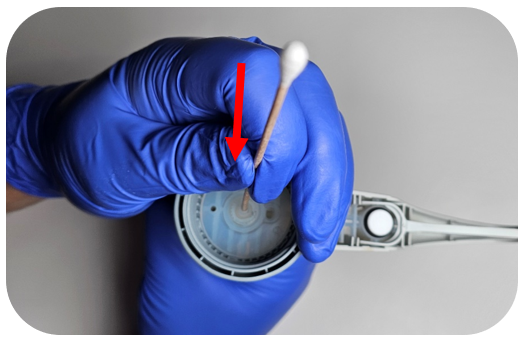
Note: This resetting procedure works for nearly all of the bottletop dispensers that BrandTech has made. The main difference is the older models do not have removeable valves.
Disclaimer: Any action you take using the information on this website is strictly at your own risk. The information herein does not constitute professional advice and is general in nature. We make no warranty that this information will meet your requirements, be safe, accurate, or error-free. Pipette Supplies, Inc. is not responsible for any errors or omissions, any results obtained from the use of this information, or any loss or damage arising out of the use of this information. This site is for educational purposes only.
Fair Use: Copyright Disclaimer under section 107 of the Copyright Act of 1976, allows for “fair use” for purposes such as comments, criticism, teaching, scholarship, news reporting, and research.
Fair use is permitted by copyright statute that might otherwise be infringing.
Leave a Reply