
The process of adjusting and troubleshooting leaks during calibration for the Eppendorf Reference 2 requires great care, a high attention to detail, patience, and steady hands. Please dedicate a good work area with good lighting and space where small parts can be located should they fly out during disassembly. Pipette damage and lost parts may occur if attention to detail is not maintained. Please proceed at your own risk.
Replacement Parts:
- Seals for the 100µL-10mL
- Lower Housing
- Counter Assembly
Note: The 2.5µL, 10µL, & 20µL have seals that are built into the tip cone which would require the complete replacement of the lower assembly.
Recommend Supplies:
- Gloves
- Eppendorf Reference 2 adjustment tool: EP 3120633006
Note: Counter assembly issues are fairly common on the Reference 2 and can cause issues with making adjustments.
Step 1:
Set the pipette to 10% of the nominal volume and check its performance at this setting. If the pipette is operating outside of its specifications, record the value in microliters, as you will need it in Step 6. Refer to the most recent revision of the Reference 2 operating manual for your pipette’s specifications.
Step 2:
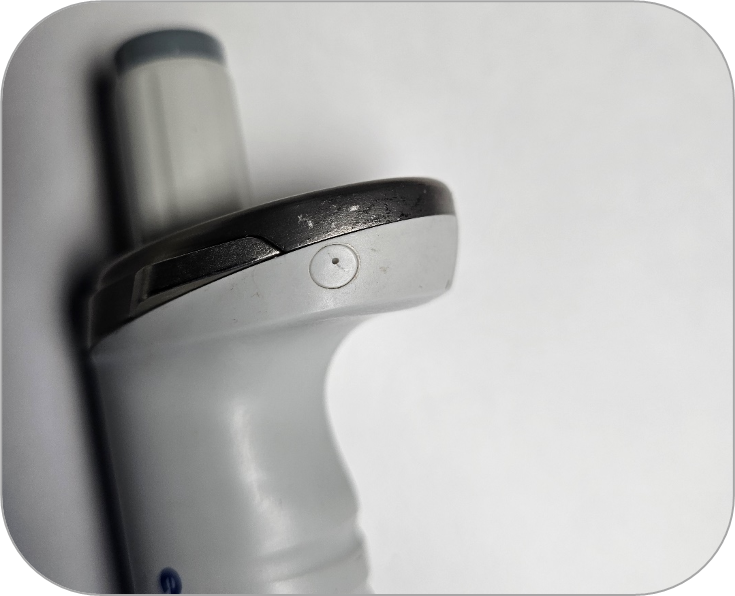
Locate the adjustment cap on the side of the pipette, near the volume catch.
Step 3:
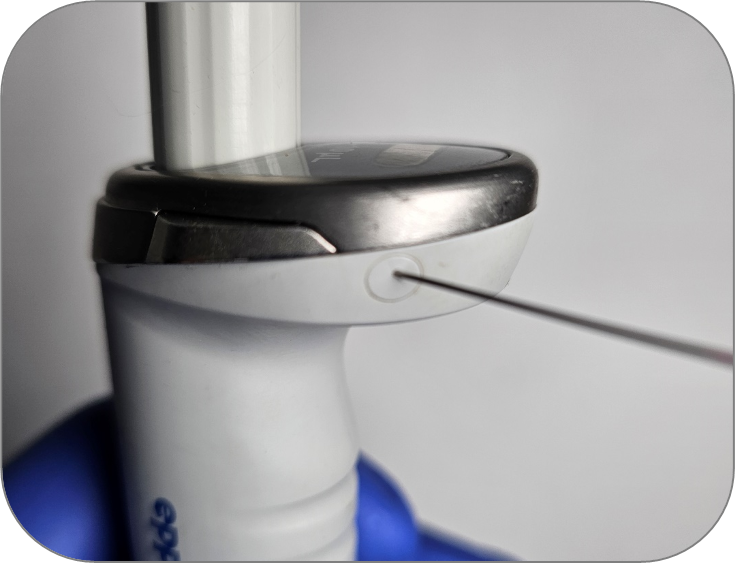
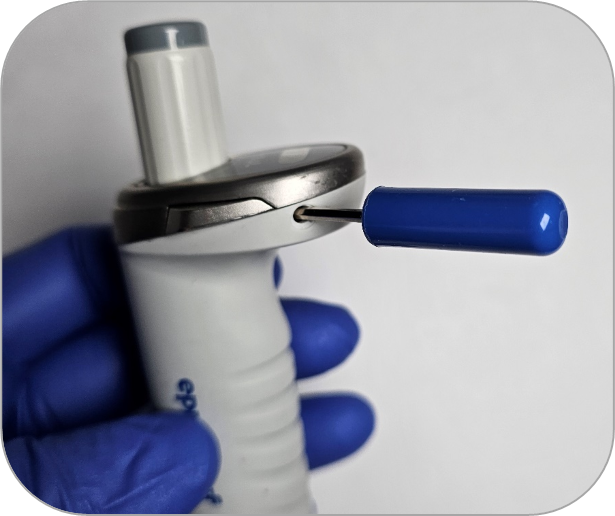
To remove the cap, insert a pin or push pin into the hole in the cap. In most cases, the pin will pass through the cap.
Note: Do not push the pin further in, as this could damage the counter.
Step 4:
Once the pin is snug in the plastic cap, gently tilt the pin toward the volume catches. This will release the cap from the pipette body.
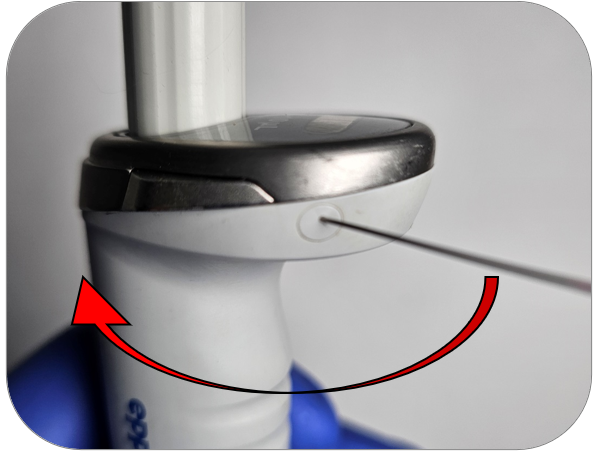
See the image below for reference.
Step 5:
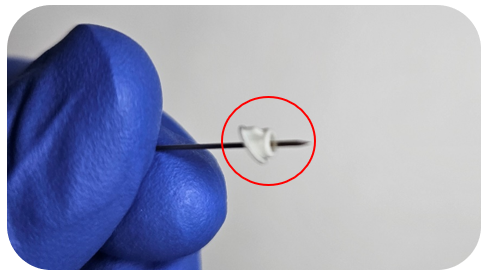
Insert the Reference 2 adjustment tool into the hole where you removed the cap. Ensure the hex key aligns with the keyed hole.
Step 6:
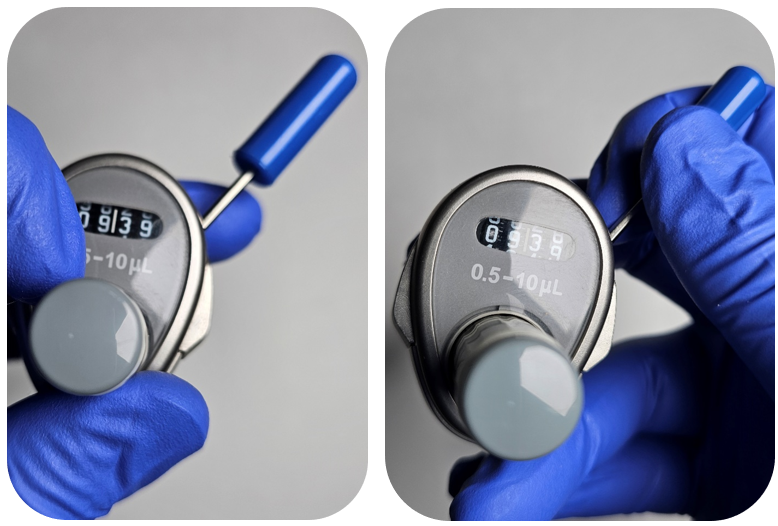
Begin adjusting by holding the volume adjustment knob while turning the adjustment tool to the value you recorded in Step 1. Turning the tool clockwise decreases the volume, while turning it counterclockwise increases the volume.
Note: The volume adjustment knob tends to move during adjustments, so maintain a firm grip. If you notice binding or stripping in the adjustment mechanism, it is typically due to a counter issue. The adjustment mechanism should move with minimal effort. If a counter replacement is required, you can find the instructions at the following link: https://pipette.zenzen1.com/blog-eppendorf/eppendorf-reference-2-how-to-replace-the-volume-catch/
Step 7:
Recheck the pipette to confirm it is now operating within specification. If a leak is detected, check the tip holder and the seal/piston.
Step 8:
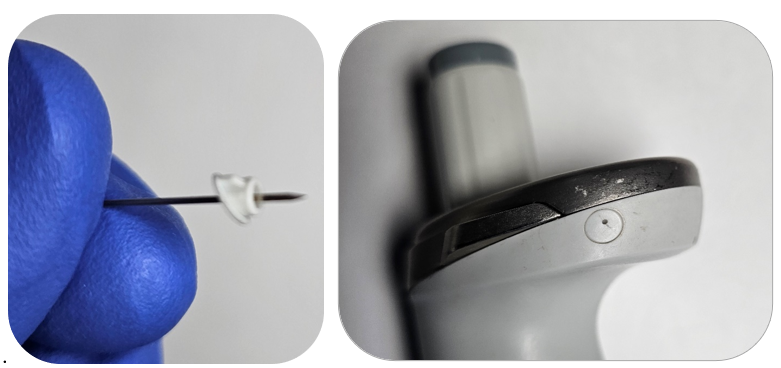
Once all adjustments are complete and the pipette is operating within manufacturer specifications at all volumes, reinstall the adjustment cap.
Note: The adjustment cap is keyed, so be sure to align the fin on the cap with the pipette body for a proper fit.
Related Posts:
Eppendorf Reference 2: How to Replace the Volume Catch (and Access the Counter Assembly)
General Troubleshooting – Liquid Leak Test Testing & 12 Point Pipette Inspection
Top 10 Crimes Committed Against Pipettes
Frequency of Pipette Preventative Maintenance and Calibration
Disclaimer: Any action you take using the information on this website is strictly at your own risk. The information herein does not constitute professional advice and is general in nature. We make no warranty that this information will meet your requirements, be safe, accurate, or error-free. Pipette Supplies, Inc. is not responsible for any errors or omissions, any results obtained from the use of this information, or any loss or damage arising out of the use of this information. This site is for educational purposes only.
Fair Use: Copyright Disclaimer under section 107 of the Copyright Act of 1976, allows for “fair use” for purposes such as comments, criticism, teaching, scholarship, news reporting, and research.
Fair use is permitted by copyright statute that might otherwise be infringing.
Leave a Reply