
The process of performing preventive maintenance (PM) on the E4 XLS/XLS+ requires great care, a high attention to detail, patience, and steady hands. Please dedicate a good work area with good lighting and space where small parts can be located should they fly out during disassembly. Pipette damage and lost parts may occur if attention to detail is not maintained. Please proceed at your own risk.
Disclaimer: These instructions are only applicable for the Rainin E4 XLS if the pipette has been upgraded with the lip seal and black colored seal retainer. See this post for more information. The instructions are applicable for all E4 XLS+ pipettes.
Recommended Supplies:
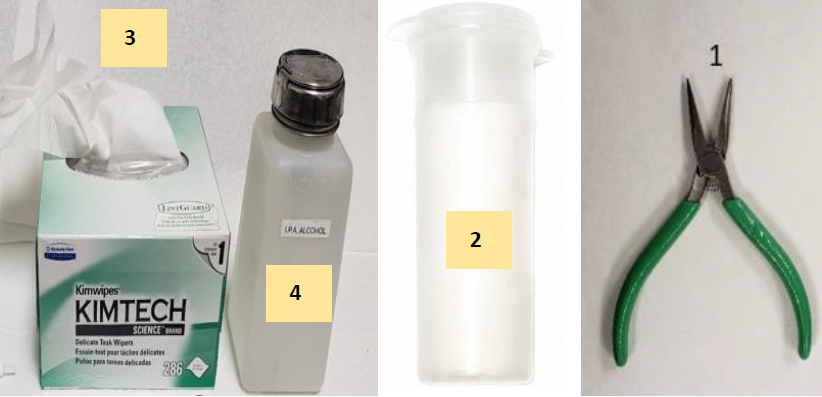
- Needle Nosed Pliers (to loosen piston assembly)
- Pipette Supplies 55g of Lip Seal Lubricant. Item# 2XLSGR55
- A box of kim wipes (to remove old lubricant from piston assembly)
- A bottle of 70% IPA (to clean piston assembly)
- Pair of laboratory gloves for PM process
- E4 XLS+ Single Channel Replacement Parts (as needed)
Step 1:
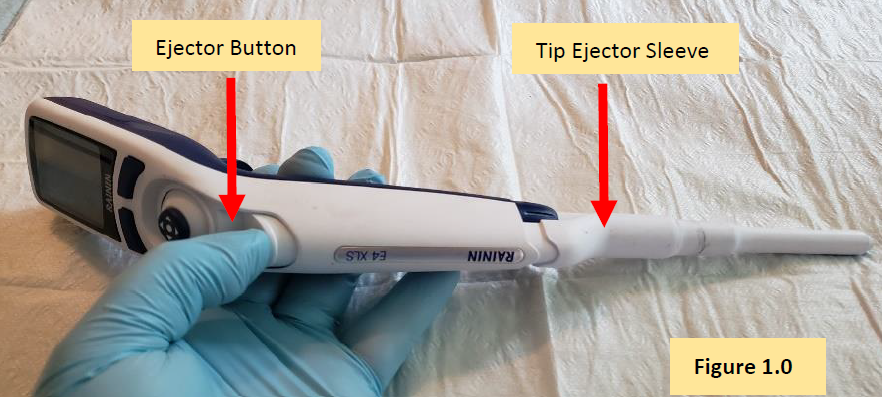
Press and hold down the tip ejector button, as shown in Figure 1.0. This will cause the white colored E4 XLS tip ejector sleeve to be lowered for easier removal from the pipette body.
Step 2:
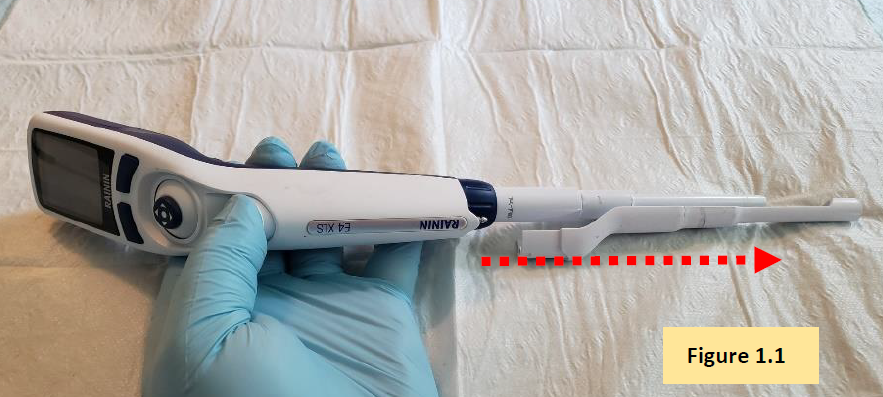
Slide off and disengage the tip ejector sleeve from the pipette body. Figure 1.1.
Step 3:
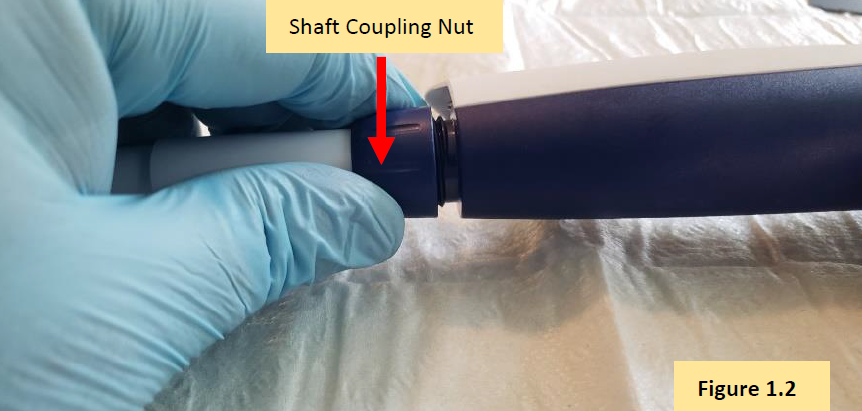
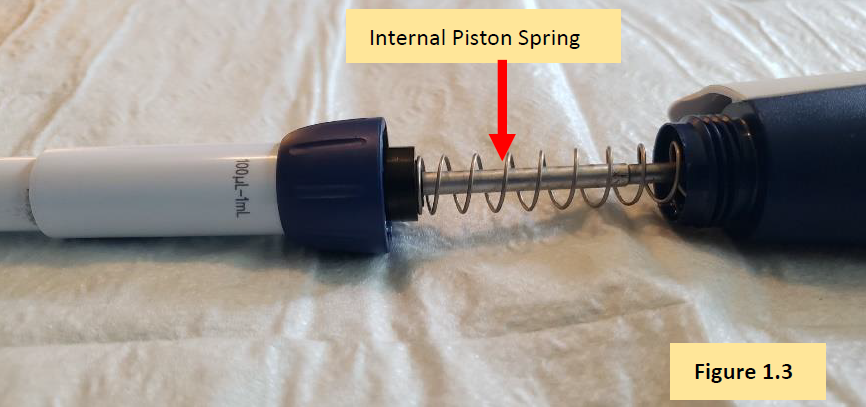
Turn the shaft coupling nut clockwise to remove the shaft from the pipette body. Figure 1.2.
CAUTION: When unscrewing the coupling nut, there is an internal piston spring that is under tension. Caution is needed to prevent small parts from popping out from inside of the shaft. It’s strongly recommended to unscrew the coupling nut over a table.
COMMENT: With the shaft coupling nut disengaged from then pipette body, you will see the internal piston assembly, with spring. Figure 1.3.
Step 4:
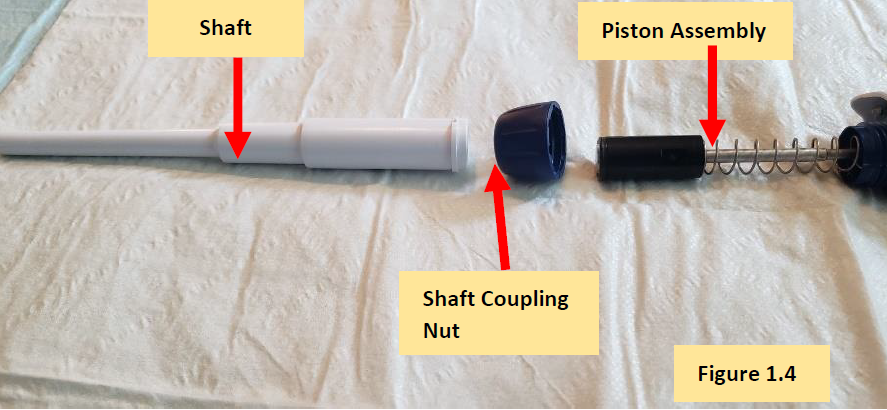
Remove the shaft from the E4 XLS pipette body and fully expose the internal piston, spring, seal retainer, and lip seal. Figure 1.4.
Step 5:
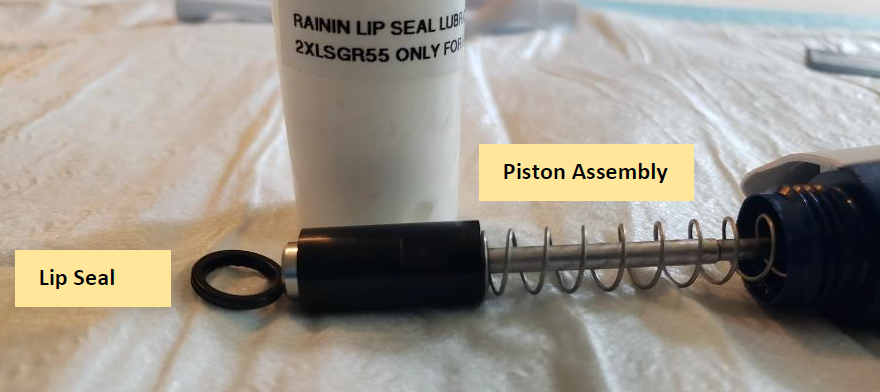
Locate and remove the lip seal from the piston assembly. Figure 1.5.
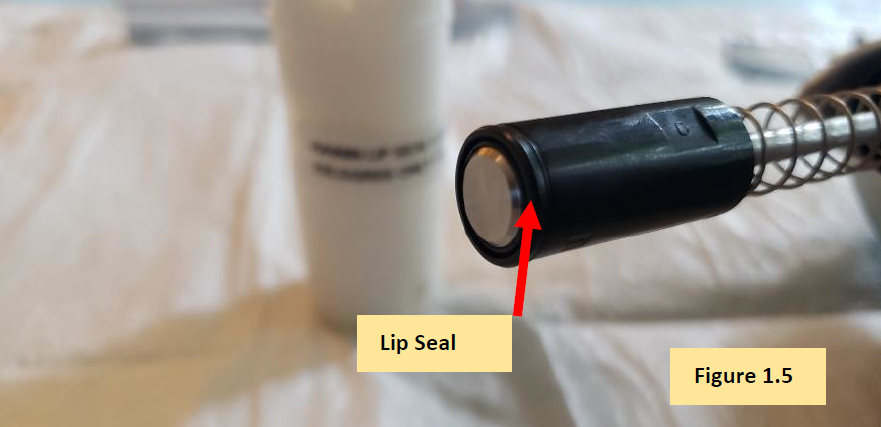
COMMENT: With the lip seal removed, now the focus shifts to servicing the piston assembly.
COMMENT: Only, follow the next steps if the piston needs to be removed and/or replaced. If not, proceed to Step 7.
Step 6:
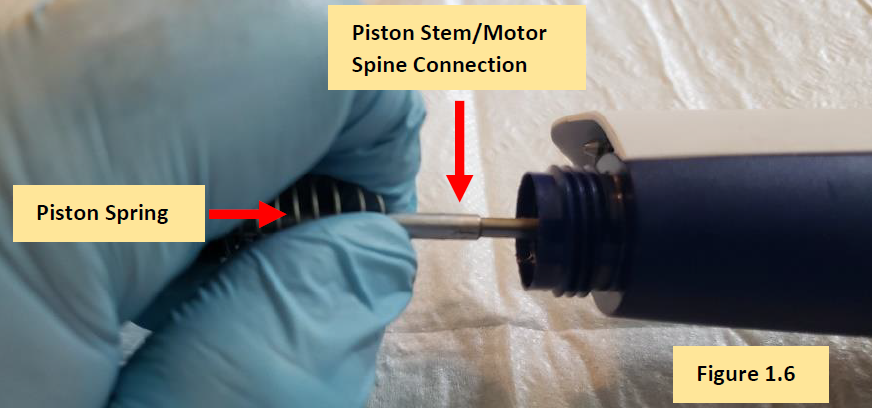
Collapse the piston spring with a gloved hand to expose the piston stem and motor spine connection. Figure 1.6.
Step 6.1:
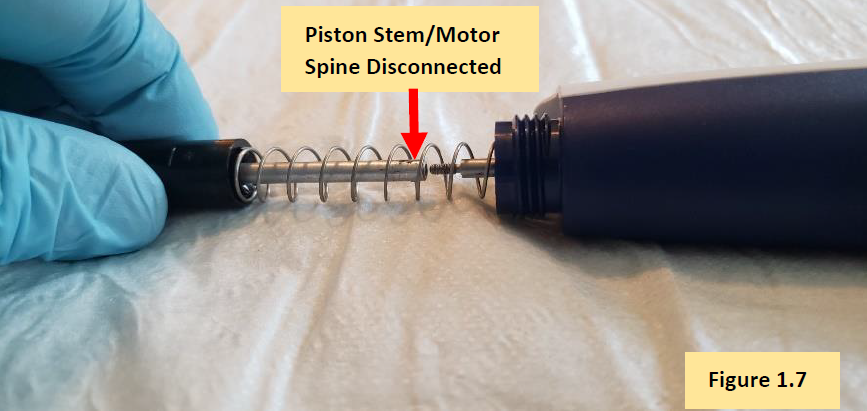
Unscrew the piston stem from the motor spine until it is fully detached. Figure 1.7.
Step 6.2:
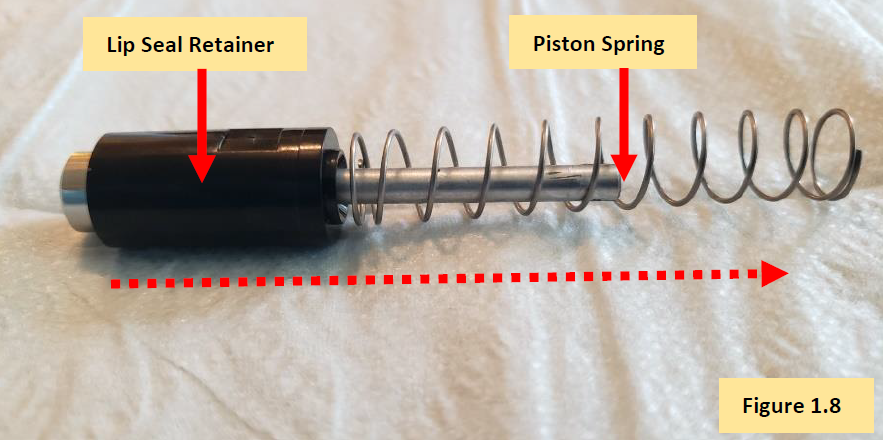
Slide and remove the piston spring from the piston spine, followed by removal of the black colored lip seal retainer. Figure 1.8.
Step 6.2 COMMENT:
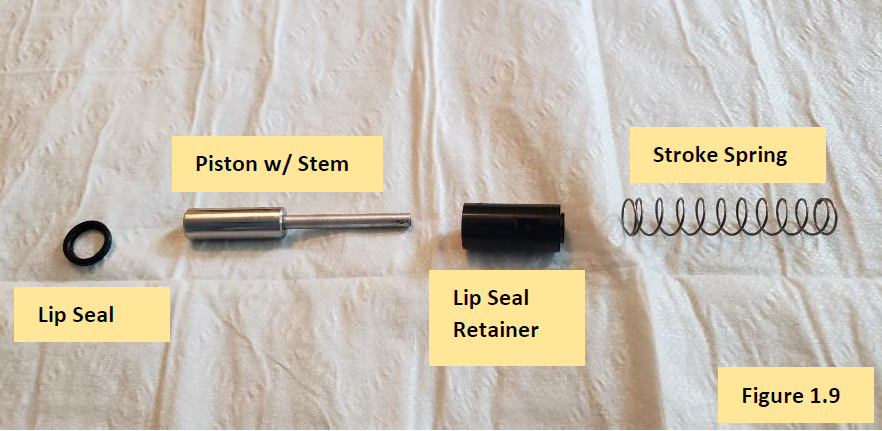
Figure 1.9 shows lip seal, piston, piston spring, and seal retainer removed from the motor spine.
Step 6.3:
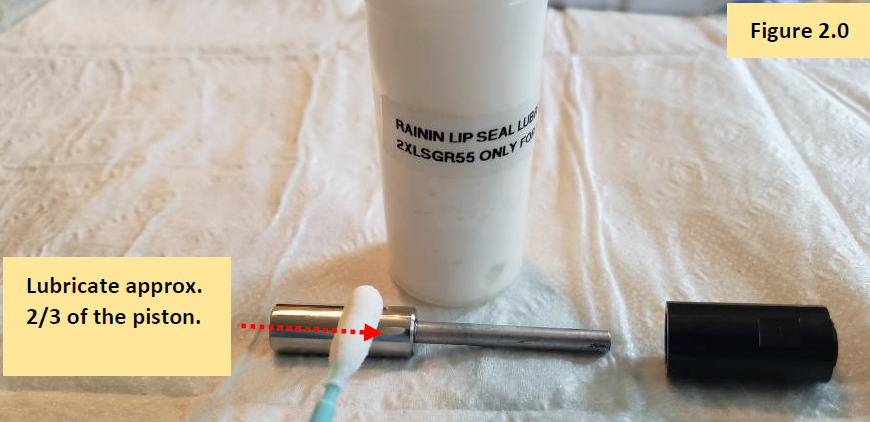
Clean and remove the old lip seal lubricant with 70% IPA and Kim Wipes. Once the E4 XLS piston is cleaned, use a foam swab to apply a light, but visible, coat of lip seal lubricant
(Item# 2XLSGR55) to the piston.
NOTE: It’s not necessary to lubricate the entire piston. Lubricate approximately 2/3 of the piston. Figure 2.0.
Step 7.0:
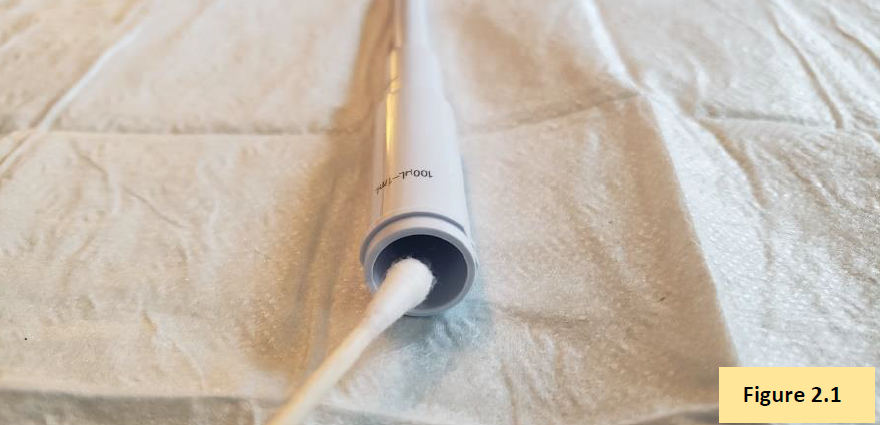
With a foam swab, Q-Tip, and IPA, clean inside of the shaft to remove any chemical splash, lubricant, etc. If needed, replace shaft. Figure 2.1.
(See E4 XLS+ Single Channel Replacement Parts)
Step 7.1:
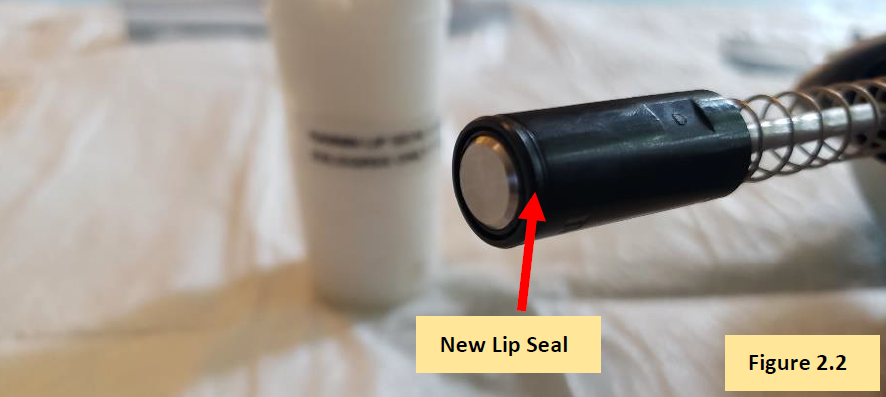
Install a new lip seal onto the piston. Figure 2.2. (See E4 XLS+ Single Channel Replacement Parts)
Step 7.2:
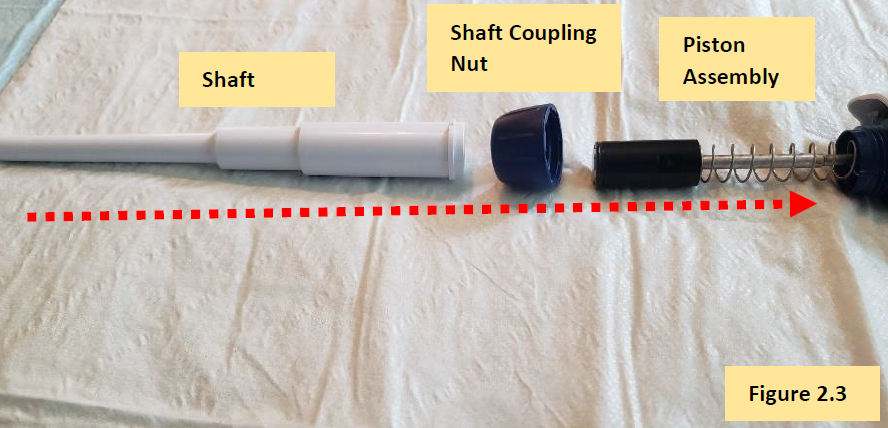
Affix and reattach the shaft to the shaft coupling nut. Figure 2.3.
Step 7.3:
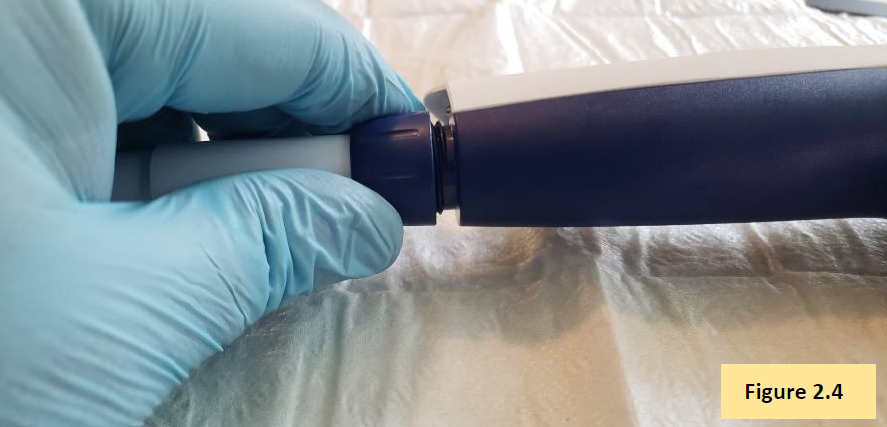
Screw the shaft coupling nut and shaft back onto the pipette body. Figure 2.4.
Step 7.4:
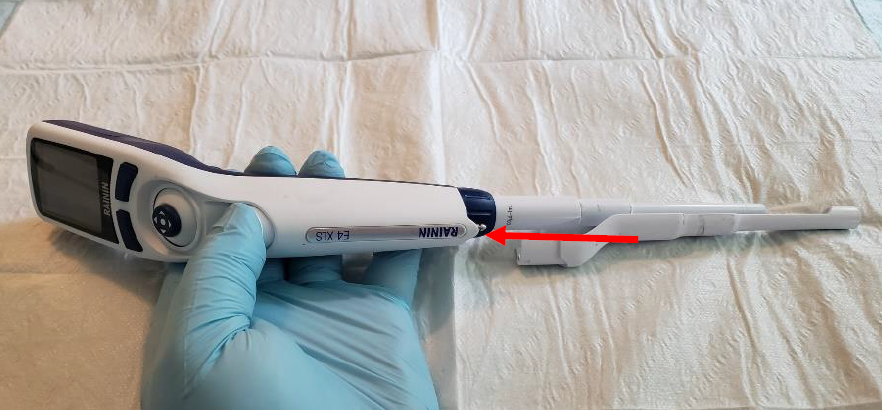
Press and hold down the tip ejector button to extend the tip ejector rod from the bottom of the pipette. Affix the tip ejector sleeve to the exposed tip ejector rod. Affix a pipette tip to the pipette and aspirate/dispense Di water to check for leaks. If a leak is detected, recheck work. If no leaks are detected, allow pipette to equilibrate for 1 hour.
Step 7.5:
After the 1-hour equilibration period has elapsed, check the E4 XLS pipette’s accuracy and precision performance on an analytical 4-5 place balance. Recheck work as needed.

Related Posts:
Seal/O-Ring Vs. Lip Seal for Pipet-Lite, Pipet-Lite XLS, and E4-XLS Models
Rainin Pipette Legend
Frequency of Pipette Preventative Maintenance and Calibration
Top 10 Crimes Committed Against Pipettes
Disclaimer: Any action you take using the information on this website is strictly at your own risk. The information herein does not constitute professional advice and is general in nature. We make no warranty that this information will meet your requirements, be safe, accurate, or error-free. Pipette Supplies, Inc. is not responsible for any errors or omissions, any results obtained from the use of this information, or any loss or damage arising out of the use of this information. This site is for educational purposes only.
Fair Use: Copyright Disclaimer under section 107 of the Copyright Act of 1976, allows for “fair use” for purposes such as comments, criticism, teaching, scholarship, news reporting, and research.
Fair use is permitted by copyright statute that might otherwise be infringing.
Leave a Reply