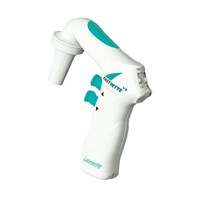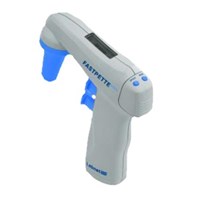
The process of removing, replacing, and reinstalling the battery for the Gilson Pipetman M & VWR Electronic(after market version of Pipetman M) requires great care, a high attention to detail, patience, and steady hands. Please dedicate a good work area with good lighting and space where small parts can be located should they pop/fly out during disassembly. Pipette damage and lost parts may occur if attention to detail is not maintained. Please proceed at your own risk.
Replacement Parts:
- Batteries: Serial Number range specific
- GI F807007 – For newer Pipetman M pipettes with serial numbers from GD14021 (battery batch code 10-2010 / 11-2010 or later)
- GI F807113 – For older Pipetman M pipettes with serial numbers from DL80001 to GD14020 (battery batch code 08-2009 and 05-2010)
- The VWR Electronic models utilize the same battery as the newer style battery (GI F807007).
Recommend Supplies:
- Flat-Head Screwdriver
- Thin Needle nose pliers
Preliminary note: This disassembly process applies to both single and multichannel models, as they have an identical upper half of the pipette and attach to the ejector assembly in the same fashion.
Step #1:
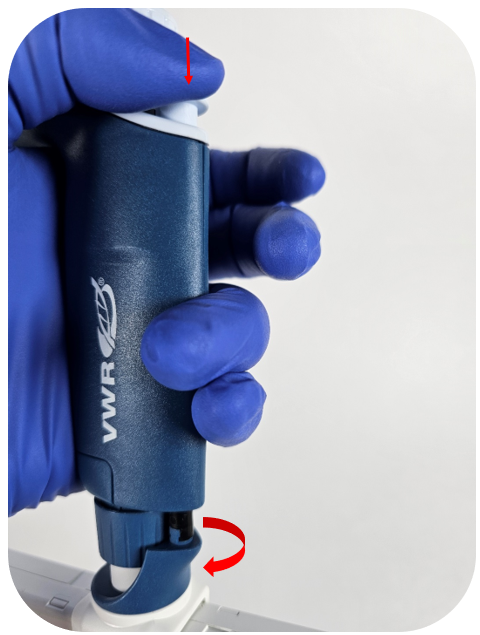
Start by pushing down on the Pipetman M / VWR Electronic ejector button and unclip the tip ejector from the ejector assembly.
Step #2:
Unthread the connecting nut from the pipette body.
Step #3:
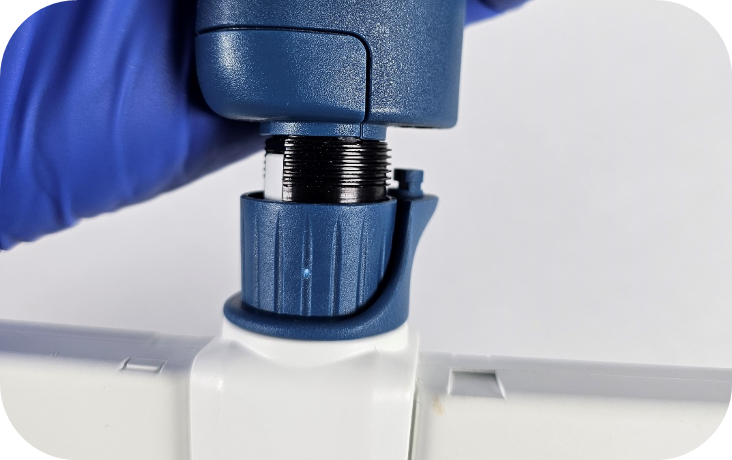
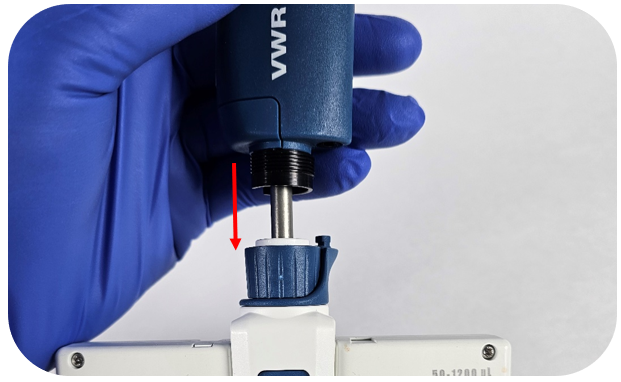
Gently pull down on the lower assembly to disconnect the lower assembly from the upper handle.
Note: The piston assemblies are magnetically attached to the spindle. In some cases —particularly with single channel models—the piston may not detach with the removal of the lower assembly. If this occurs, gently pull down on the piston assembly to remove it. To prevent damage, it is recommended to remove the piston/operating system before proceeding.
Step #4:
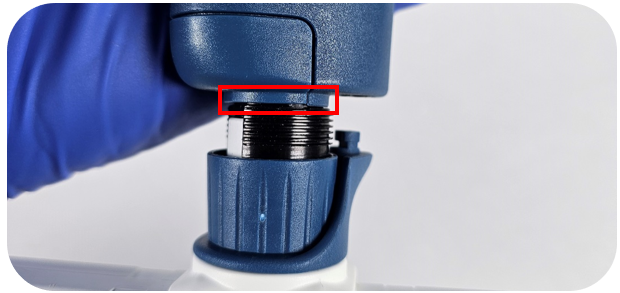
Some Pipetman M / VWR Electronic multichannel models have an O-ring located above the threads on the pipette body (see picture below for reference). The O-ring tend to dry out and crack over time. It is recommended to remove the O-ring as part of this repair process.
Note: Gilson does not replace these O-rings as part of their standard service.
Step #5:
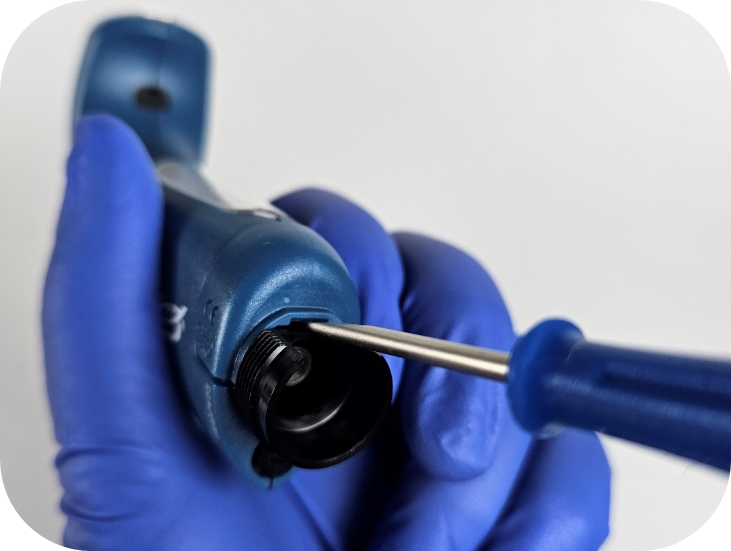
Using the flat-head screwdriver, pry up the battery door on the bottom of the handle (see picture below for reference).
Step #6:
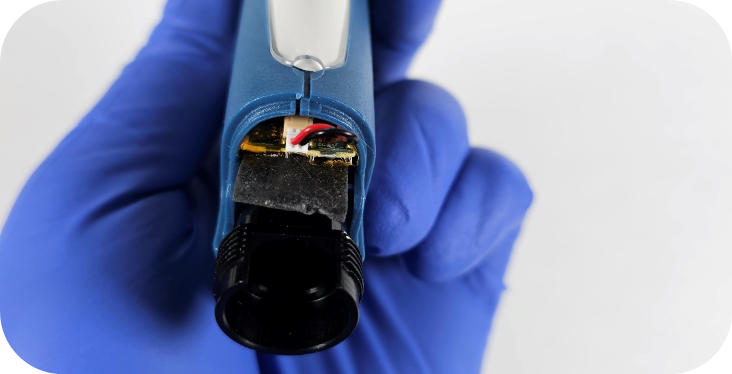
Once the battery door is removed, carefully unplug the connector from the socket on the battery’s circuit board.
Note: It’s a good idea to connect the new battery first to confirm it resolves the issue before attempting to remove the old battery, as the new battery could be damaged during removal.
Step #7:
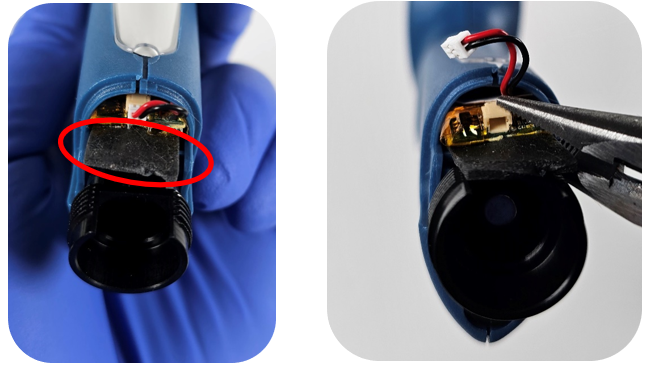
After the plug is disconnected, locate the tab on the back of the battery and slowly pull the battery out of the compartment.
Note: It’s common for the battery removal tab to break during this process. Needle-nose pliers can be helpful, as space in the battery compartment is limited. To remove the battery using pliers, position the two sides of the pliers around the socket on the circuit board and carefully pull the battery out.
Step #8:
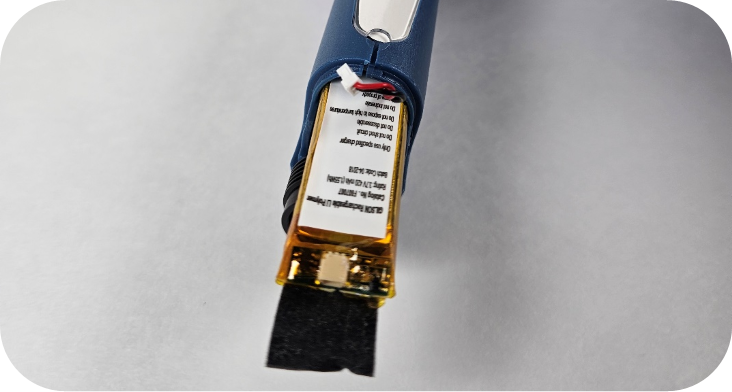
Install the new battery, ensuring that the side with the tab and socket is oriented correctly. Refer to the image below for the proper orientation of the battery.
Step #9:
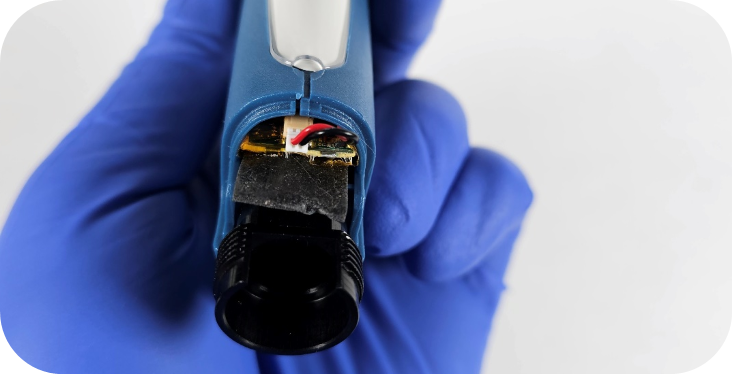
Push the battery fully into the battery compartment, then reinsert the plug into the socket on the circuit board.
Step #10:
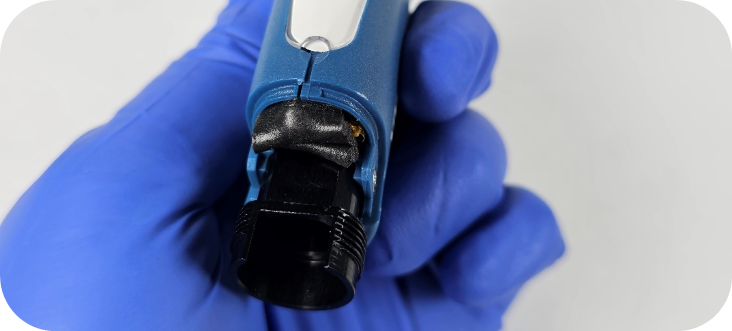
Before securing the battery door, make sure to lift the tab to ensure the door sits flat. In some cases, the flap can be tucked over the circuit board and into the top edge of the battery compartment, as shown in the image below.
Step #11:
Reattach the Pipetman M / VWR Electronic battery door, then reconnect the spindle to the piston (or to the operating system for multichannel pipettes).
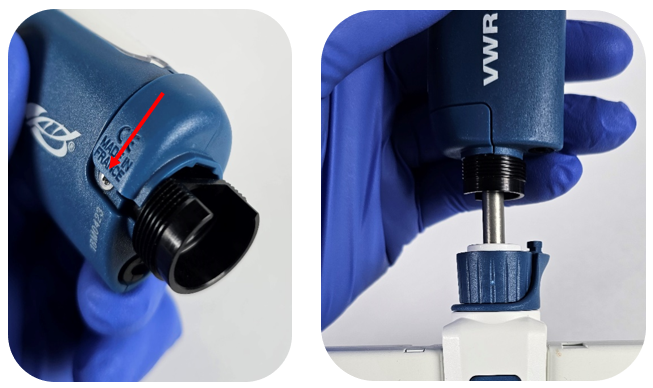
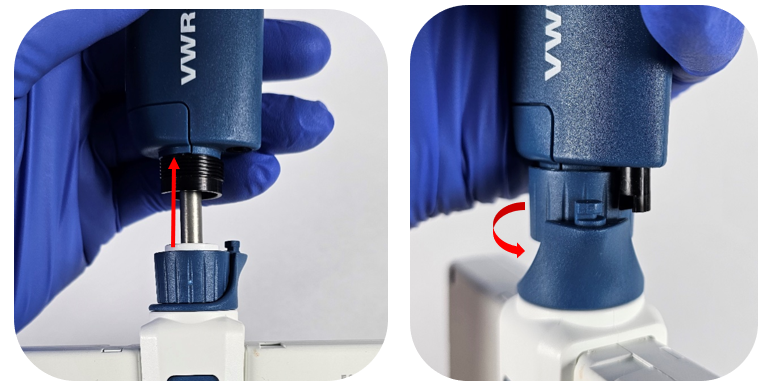
Step# 12:
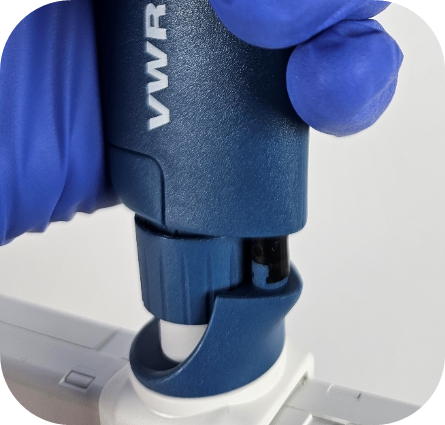
Slowly push the lower assembly toward the pipette body/handle. Once it is fully seated, tighten the connecting nut securely around it.
Step# 13:
Push down on the ejector button and reattach the tip ejector clip.
Note: When reattaching the lower assemblies of single channel pipettes, leaks can occur. It is important to ensure that all lower assembly parts are tightly secured.
Disclaimer: Any action you take using the information on this website is strictly at your own risk. The information herein does not constitute professional advice and is general in nature. We make no warranty that this information will meet your requirements, be safe, accurate, or error-free. Pipette Supplies, Inc. is not responsible for any errors or omissions, any results obtained from the use of this information, or any loss or damage arising out of the use of this information. This site is for educational purposes only.
Fair Use: Copyright Disclaimer under section 107 of the Copyright Act of 1976, allows for “fair use” for purposes such as comments, criticism, teaching, scholarship, news reporting, and research.
Fair use is permitted by copyright statute that might otherwise be infringing.